RunWay (21) TakeoffView 보강
지금 TakeoffView의 값들이 하드코딩 되어있는데 이걸 실기기 반영을 해보도록 한다.

현재는 하드코딩되어있는데, 워치 연동 그리고 battery 상태 등을 활용해서 실기기를 반영하도록 수정해본다.
GPS 신호
우선 GPS 감도이다.
LocationService에 이미 accuracy: Double 프로퍼티가 있다. CLLocationManager가 위치 업데이트를 받을 때마다 horizontalAccuracy 값이 갱신되는데, 이 값이 낮을수록 GPS 신호가 강하다는 의미다.
다만 accuracy가 갱신되려면 위치 업데이트가 시작되어 있어야 한다. 기존에는 startTracking()을 러닝 시작 시점에 호출하고 있었는데, TakeoffView 진입 시점에 미리 호출하면 두 가지 이점이 생긴다. 첫째로 GPS 락을 미리 잡아두어 실제 러닝 시작 시 딜레이를 줄일 수 있고, 둘째로 현재 GPS 신호 강도를 사용자에게 보여줄 수 있다.
horizontalAccuracy 기준으로 신호 강도를 판단하는 방식은 아래와 같다. Apple 공식 문서에 따르면 horizontalAccuracy는 위치의 반경 오차(미터)를 나타내며, 값이 음수면 유효하지 않은 위치다.
이름이 “정확도”라서 클수록 좋을 것 같은데 반대다. 이 값은 “지금 알려준 위치가 이 정도 반경 안 어딘가에 있다”는 뜻이라, 작을수록 좁게 짚었다는 의미다. 5m면 반경 5m 원 안, 50m면 반경 50m 원 안이다. 그래서 10 미만을 STRONG으로 잡았다.
CLLocation.horizontalAccuracy Docs
1
2
3
4
5
6
7
var gpsSignalStatus: (label: String, ok: Bool) {
    let accuracy = locationService.accuracy
    if accuracy <= 0 { return ("NO SIGNAL", false) }
    if accuracy < 10 { return ("STRONG", true) }
    if accuracy < 30 { return ("GOOD", true) }
    return ("WEAK", false)
}
RunViewModel에 위 프로퍼티를 추가했다. 그런데 코드를 정리하다 보니 start() 호출이 중복되는 문제를 발견했다.
기존에는 PFDView .task에서 startOrigin == .local일 때 start()를 호출하고 있었는데, 이건 미러링 도입 초기에 iPhone이 항상 독자적으로 GPS를 돌리던 시절의 코드였다. 지금은 startOrigin == .local일 때만 GPS를 켜도록 바꿨고, TakeoffView는 항상 iPhone 주도일 때만 거치는 화면이라 카운트다운 끝에서 start()를 호출하면 PFDView에서 또 호출하는 게 중복이 된다.
그래서 PFDView .task에서 start() 호출을 제거하고, TakeoffView 카운트다운 끝에서만 start()를 호출하는 구조로 정리했다.
1
2
3
4
5
6
7
8
9
10
11
12
// PFDView .task - before
.task {
    if HealthKitService.shared.startOrigin == .local {
        runViewModel.start()
    }
    await runViewModel.startStream()
}

// PFDView .task - after
.task {
    await runViewModel.startStream()
}
그리고 start()에서 locationService.startTracking()을 분리했다. TakeoffView 진입 시점에 GPS 락을 미리 잡아두기 위해 RunViewModel에 prepareTracking()을 추가하고, TakeoffView .task에서 호출하도록 했다.
1
2
3
4
// RunViewModel
func prepareTracking() {
    locationService.startTracking()
}
1
2
3
4
// TakeoffView
.task {
    runViewModel.prepareTracking()
}
그리고 하드코딩 되어있던 부분을
1
2
3
4
5
6
7
8
9
10
11
12
13
14
15
16
17
18
// Before
let checkItems: [(icon: String, name: String, value: String, ok: Bool)] = [
    ("wifi", "GPS SIGNAL", "STRONG", true),
    ("heart.fill", "HEART RATE", "87%", true),
    ("waveform.path.ecg", "CADENCE SENSOR", "CONNECTED", true),
    ("battery.75", "BATTERY", "92%", true),
    ("cloud.sun", "WEATHER", "GOOD", true),
]

// After
var checkItems: [(icon: String, name: String, value: String, ok: Bool)] {
    [
        ("wifi", "GPS SIGNAL", runViewModel.gpsSignalStatus.label, runViewModel.gpsSignalStatus.ok),
        ("applewatch", "APPLE WATCH", runViewModel.watchStatus.label, runViewModel.watchStatus.ok),
        ("battery.75", "BATTERY", runViewModel.batteryStatus.label, runViewModel.batteryStatus.ok),
        ("cloud.sun", "WEATHER", runViewModel.weatherStatus.label, runViewModel.weatherStatus.ok),
    ]
}
이렇게 computedProperty로 바꿔준다.
다만 이때 심박이나 케이던스는 결국 어차피 워치와 연동이 되어있느냐라서 굳이 2개로 할필요가 없다고 판단하여 하나로 통합해 주었다.
Apple Watch 연결
심박수와 케이던스는 둘 다 Watch에서 오는 데이터라 별도로 구분할 필요가 없다. 두 항목을 APPLE WATCH 하나로 통합하고, Watch 연결 여부만 표시하도록 했다.
WCSession.isReachable은 상대 기기의 Watch 앱이 실행 중이고 통신 가능한 상태일 때 true를 반환한다. TakeoffView에서 Watch가 연결되어 있는지 확인하기에 적합하다.
isWatchConnected는 iOS에서만 의미 있는 값이라 WatchConnectivityService.swift 공통 파일의 #if os(iOS) 블록 안에 추가했다.
1
2
3
4
5
6
7
8
9
10
11
12
13
14
15
// WatchConnectivityService.swift
#if os(iOS)
weak var viewModel: RunViewModel?
var isWatchConnected: Bool {
    session.isReachable
}
#elseif os(watchOS)
weak var viewModel: WatchViewModel?
#endif

// RunViewModel
var watchStatus: (label: String, ok: Bool) {
    let connected = watchConnectivityService.isWatchConnected
    return connected ? ("CONNECTED", true) : ("NOT CONNECTED", false)
}
이때 WCSession.isReachable은 Watch 기기가 근처에 있다고 해서 바로 true가 되는 게 아니다.
Watch 앱이 실제로 포그라운드에서 실행 중이어야 true를 반환한다. 즉 TakeoffView에서 CONNECTED가 표시되려면 Watch에서 RunWay 앱을 먼저 열어둬야 한다.
다만 미러링 자체는 isReachable과 무관하게 동작한다.
Watch 앱이 백그라운드 상태여도 workoutSessionMirroringStartHandler가 트리거되어 미러링은 정상적으로 시작된다. TakeoffView의 APPLE WATCH 항목은 어디까지나 사전 연결 상태를 시각적으로 알려주는 용도다.
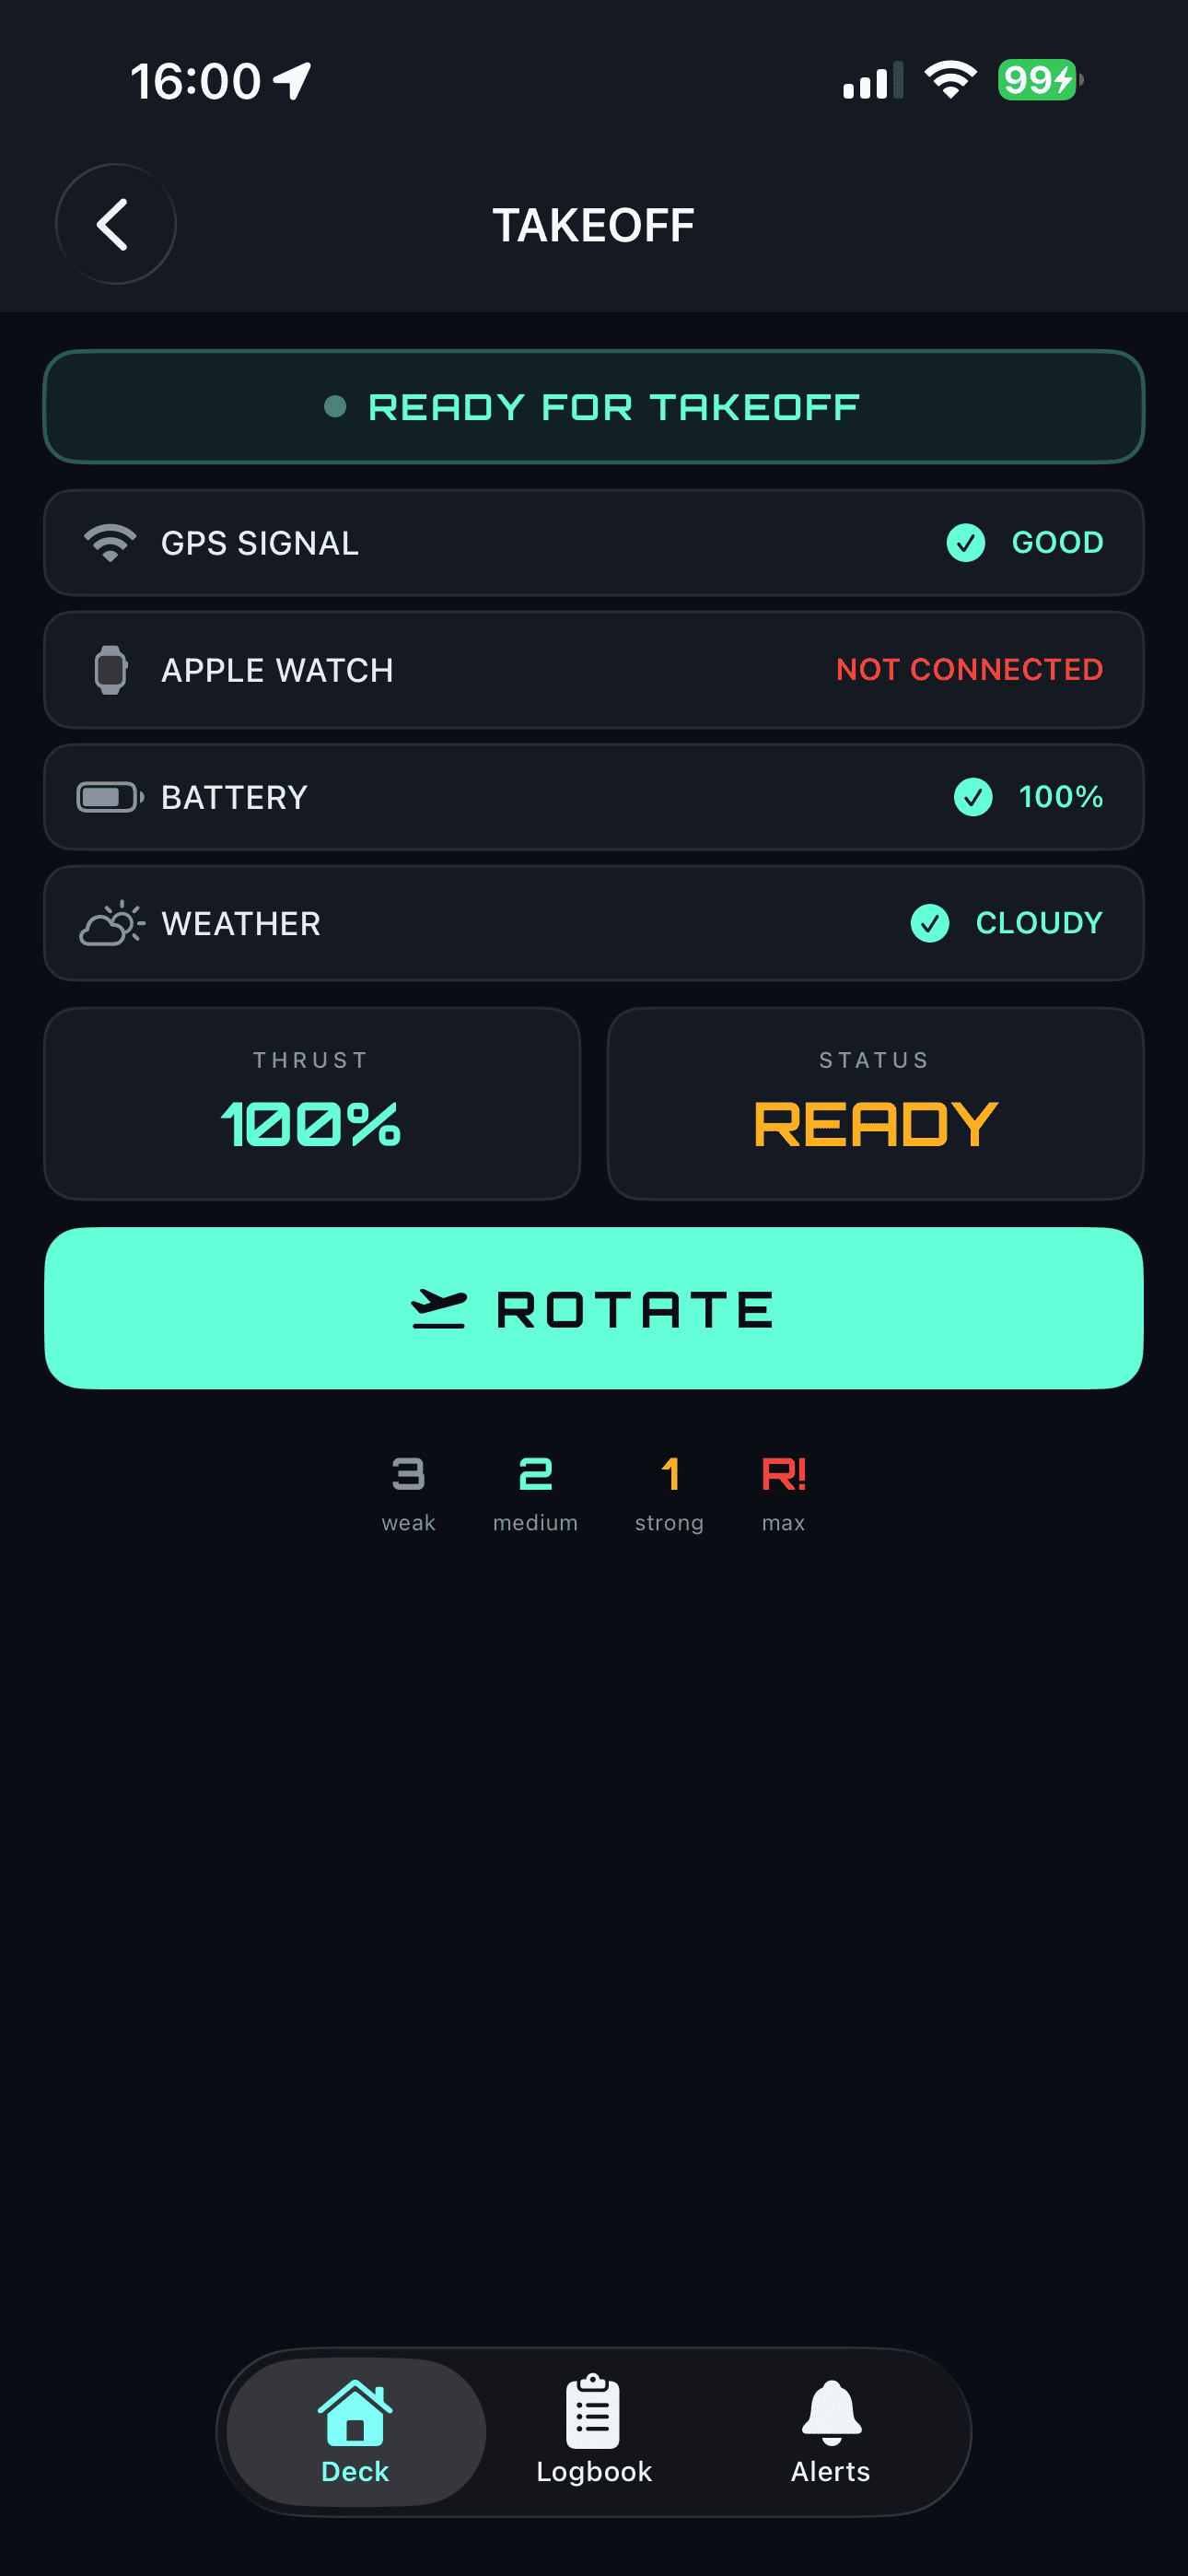 Watch 앱이 백그라운드이거나 실행되지 않았을 때
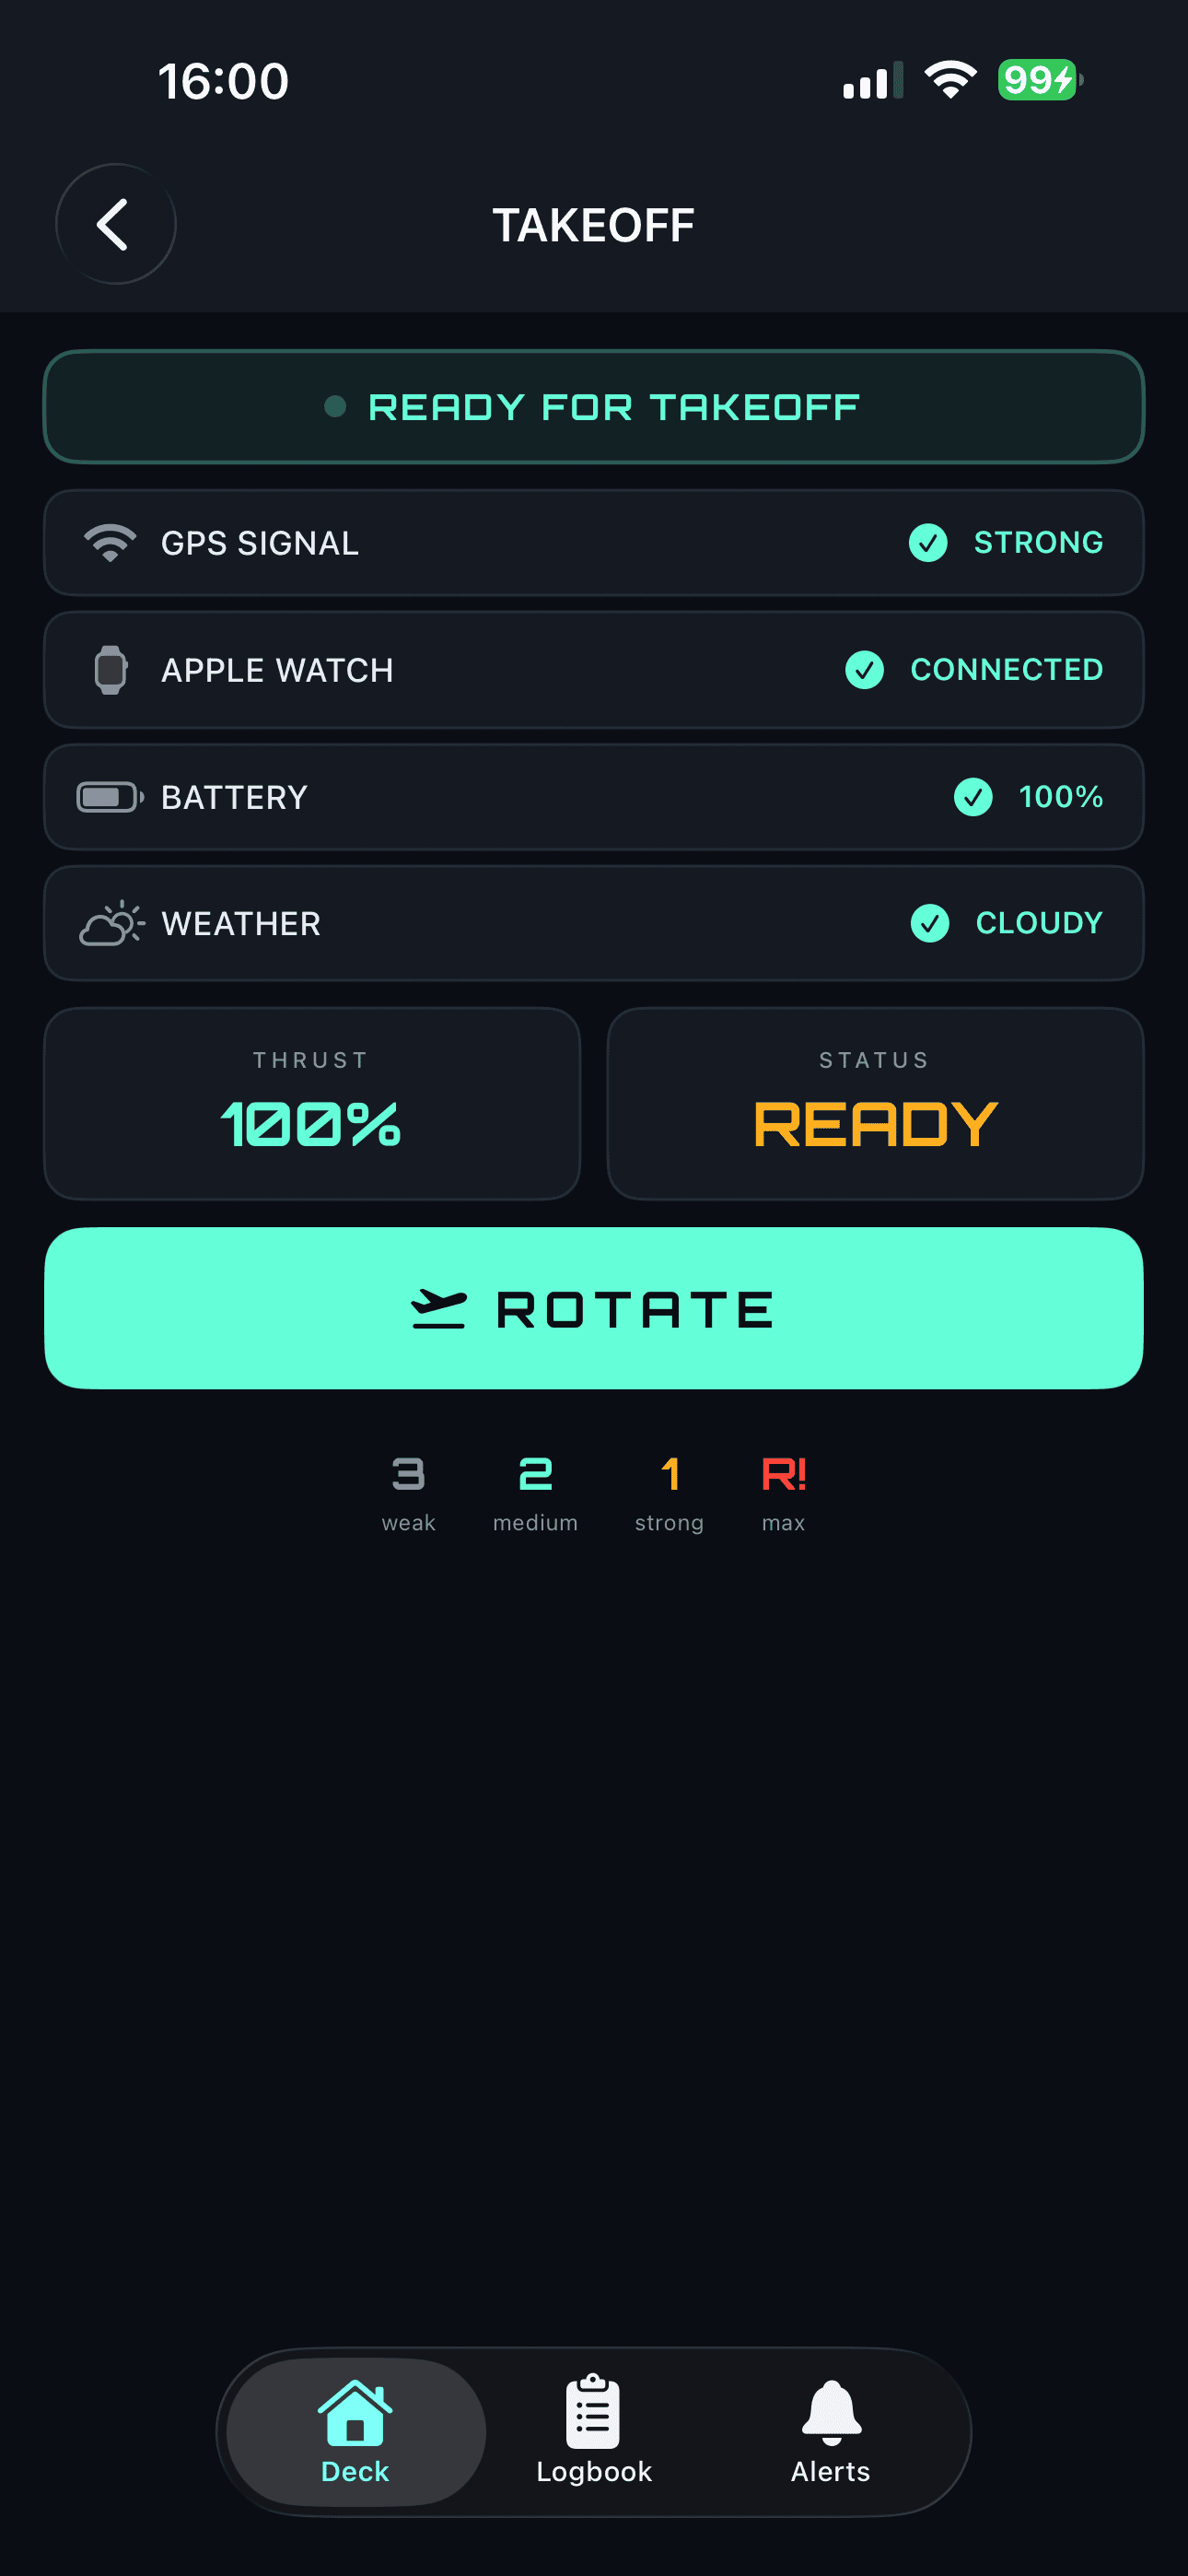 Watch 앱이 포그라운드로 실행 중일 때
배터리
배터리 잔량은 UIDevice.current.batteryLevel로 가져올 수 있다. 다만 기본적으로 배터리 모니터링이 비활성화되어 있어서 UIDevice.current.isBatteryMonitoringEnabled = true를 먼저 설정해야 한다.
VM은 UI와 무관한 레이어라 UIKit을 임포트할 이유가 없다. 배터리 상태는 TakeoffView 안에서 직접 computed property로 처리했다.
1
2
3
4
5
6
7
8
// TakeoffView
var batteryStatus: (label: String, ok: Bool) {
    UIDevice.current.isBatteryMonitoringEnabled = true
    let level = UIDevice.current.batteryLevel
    if level < 0 { return ("UNKNOWN", false) }
    let percent = Int(level * 100)
    return ("\(percent)%", percent >= 20)
}
batteryLevel은 0.0 ~ 1.0 사이 값을 반환하고 시뮬레이터에서는 -1을 반환한다. 20% 미만이면 ok를 false로 처리해 체크 아이콘 없이 빨간색으로 표시되도록 했다.
날씨
날씨 정보는 Apple의 WeatherKit을 사용했다. WeatherKit은 WWDC22에서 공개된 Apple 자체 날씨 프레임워크로, 서드파티 SDK 없이 async/await으로 간결하게 날씨 데이터를 받아올 수 있다. Apple Developer 계정당 월 500,000 API 호출이 무료로 제공된다.
Capabilities 추가
WeatherKit을 사용하려면 Xcode에서 타겟의 Signing & Capabilities에 WeatherKit을 추가해야 한다. 이 과정이 빠지면 네트워크 오류처럼 보이는 문제가 발생할 수 있어서 주의가 필요하다.
WeatherKitService
LocationService, HealthKitService처럼 독립 서비스 클래스로 분리했다. @Observable 없이 순수 클래스로 만들고, RunViewModel에서 인스턴스를 들고 있으면서 결과를 받아 처리하는 구조다.
fetchWeather()는 결과를 반환하고, VM에서 받아서 프로퍼티에 세팅한다.
1
2
3
4
5
6
7
8
9
10
11
12
13
14
15
16
17
18
19
20
21
22
23
24
25
26
27
28
29
30
31
32
import WeatherKit
import CoreLocation

final class WeatherKitService {
    private let service = WeatherService()

    func fetchWeather(latitude: Double, longitude: Double) async -> (label: String, ok: Bool) {
        guard latitude != 0, longitude != 0 else {
            return ("N/A", false)
        }

        let location = CLLocation(latitude: latitude, longitude: longitude)
        do {
            let weather = try await service.weather(for: location)
            let condition = weather.currentWeather.condition
            switch condition {
            case .clear, .mostlyClear, .partlyCloudy:
                return ("GOOD", true)
            case .cloudy, .mostlyCloudy:
                return ("CLOUDY", true)
            case .rain, .drizzle, .heavyRain:
                return ("RAIN", false)
            case .snow, .heavySnow:
                return ("SNOW", false)
            default:
                return ("CHECK", false)
            }
        } catch {
            return ("N/A", false)
        }
    }
}
RunViewModel에서 결과를 받아 프로퍼티로 세팅하고, TakeoffView .task에서 호출한다.
1
2
3
4
5
6
7
8
9
10
11
12
13
14
15
16
17
18
// RunViewModel
var weatherLabel: String = "LOADING"
var weatherOk: Bool = true

func loadWeather() async {
    let result = await weatherKitService.fetchWeather(
        latitude: locationService.latitude,
        longitude: locationService.longitude
    )
    weatherLabel = result.label
    weatherOk = result.ok
}

// TakeoffView .task
.task {
    runViewModel.prepareTracking()
    await runViewModel.loadWeather()
}
하지만 날씨정보가 바로 나오는게 아닌듯해서 5초의 대기 시간을 주도록 했다.
1
2
3
4
5
6
7
8
9
10
11
12
13
func loadWeather() async {
    // GPS 락 잡힐 때까지 최대 5초 대기
    for _ in 0..<10 {
        if locationService.latitude != 0 && locationService.longitude != 0 { break }
        try? await Task.sleep(for: .milliseconds(500))
    }
    let result = await weatherKitService.fetchWeather(
        latitude: locationService.latitude,
        longitude: locationService.longitude
    )
    weatherLabel = result.label
    weatherOk = result.ok
}
그래도 나오지 않아서 print를 찍어 확인을 해본다.
1
fetchWeather: error=Error Domain=WeatherDaemon.WDSJWTAuthenticatorServiceListener.Errors Code=2 "(null)"
JWT 인증 에러였다. Xcode에서 Signing & Capabilities에 WeatherKit을 추가하고 Apple Developer 포털의 Capabilities 탭에도 체크되어 있었는데도 같은 에러가 발생했다.
구글링 결과, developer 사이트에서 프로젝트에 해당하는 Identifier에 들어가서 Capabilities 탭이 아닌 App Services 탭에도 별도로 WeatherKit을 체크해줘야 한다는 걸 알게 됐다.


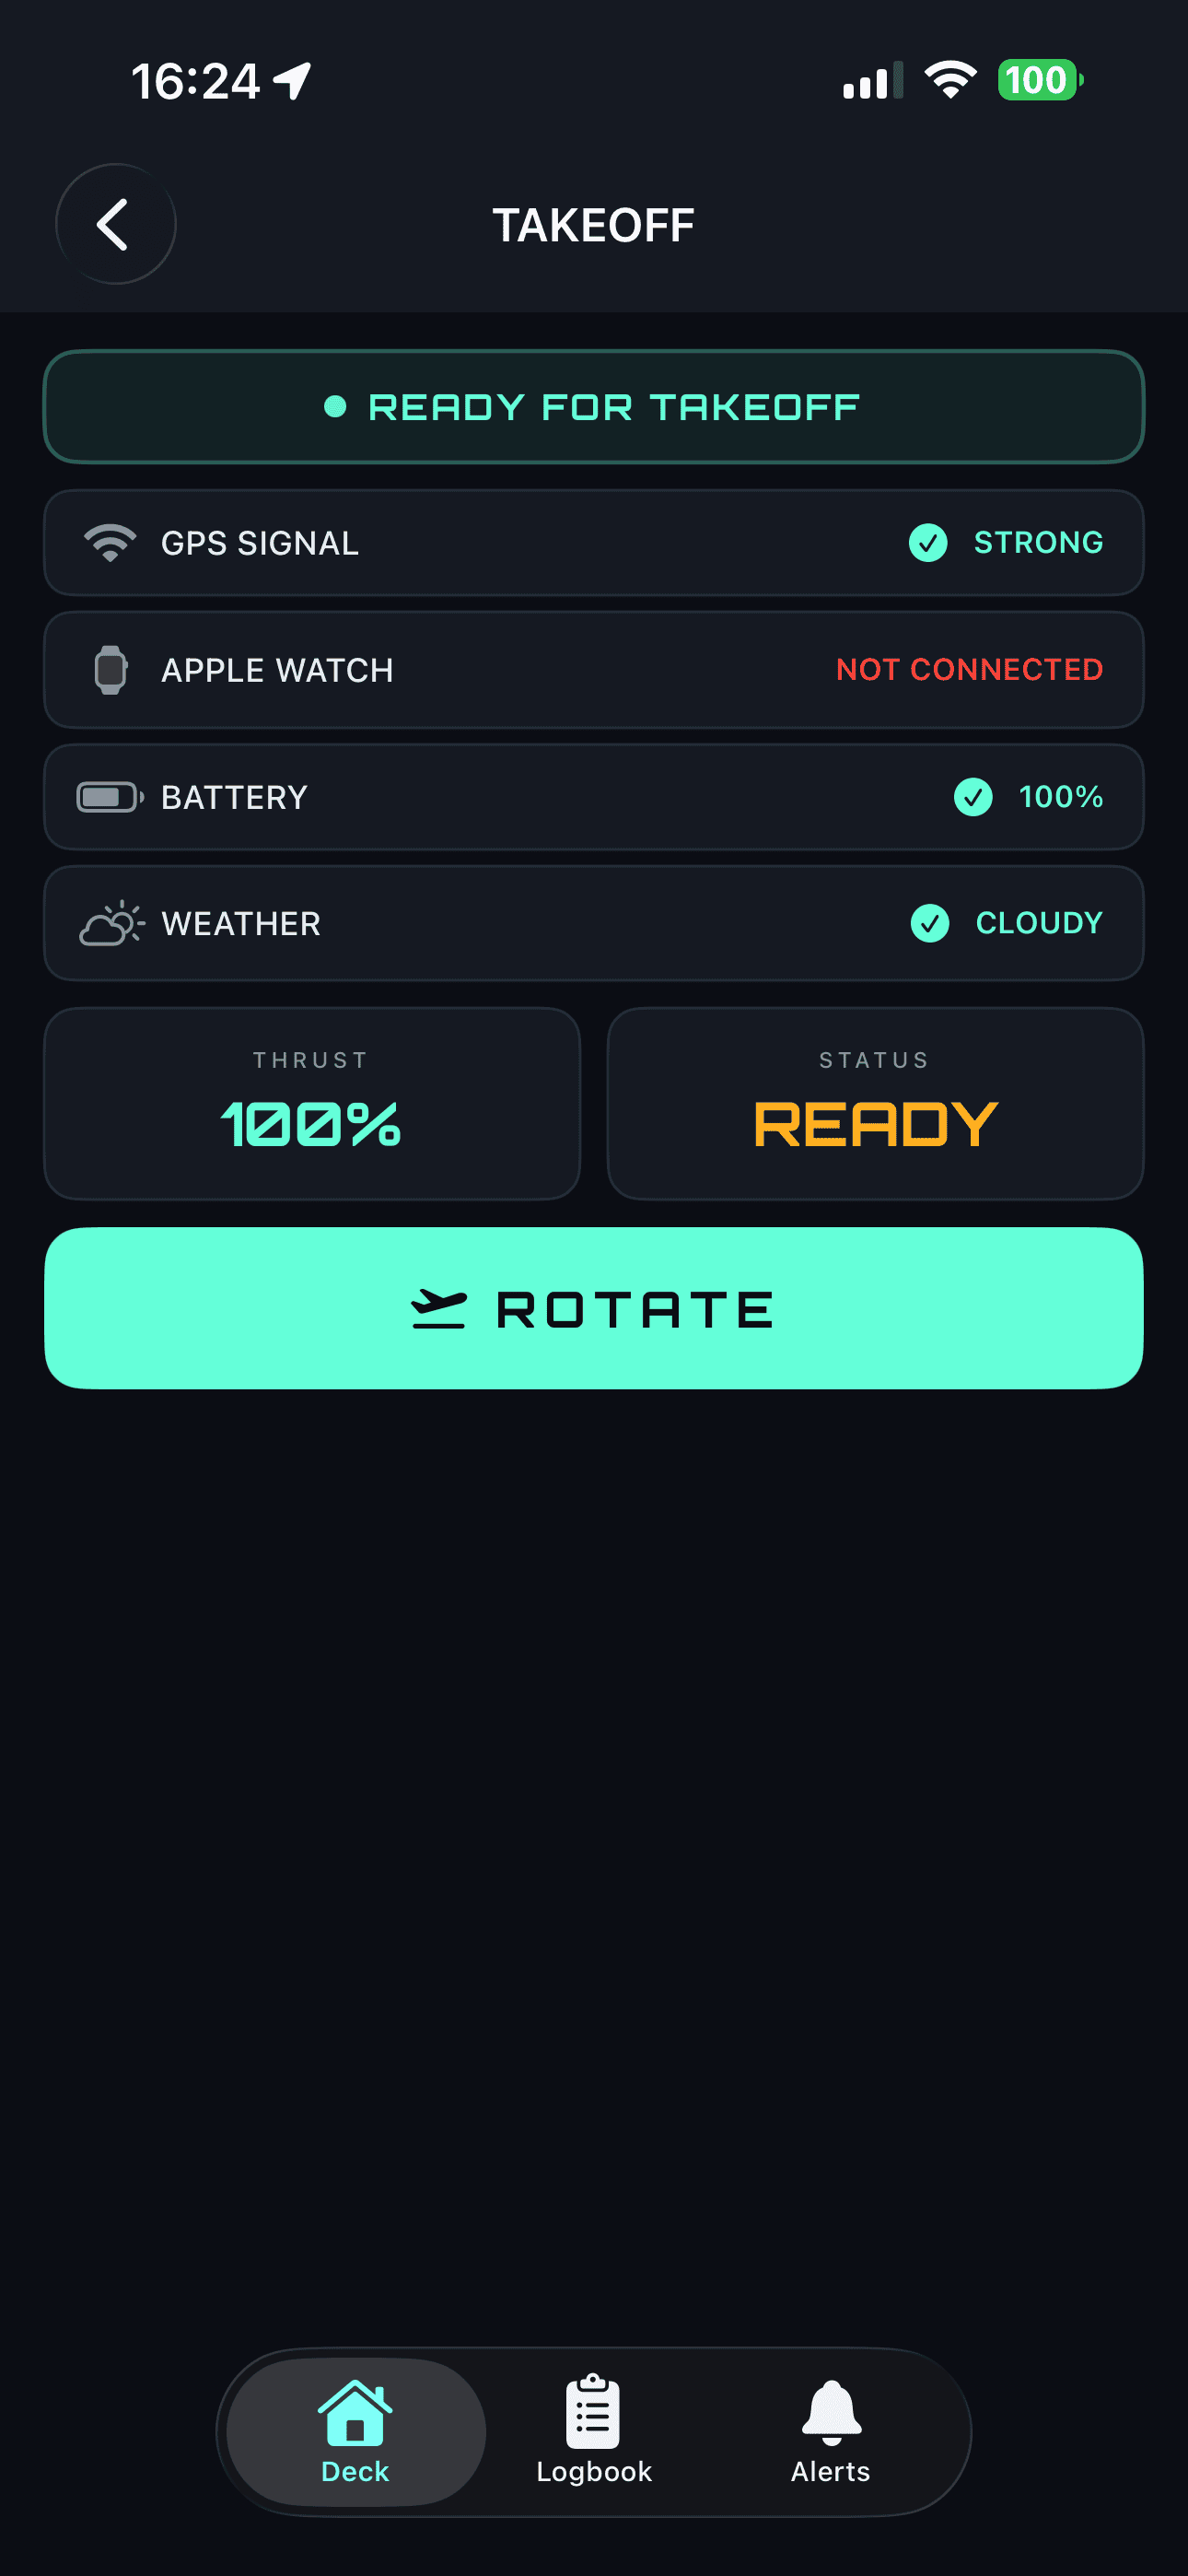
시뮬레이터에서 이렇게 나오는걸 알 수 있다.
onDisappear 처리
TakeoffView에서 .task로 prepareTracking()을 호출해 GPS 락을 미리 잡아두는데, ROTATE 없이 뒤로 나가는 경우 트래킹이 계속 돌고 있는 문제가 생긴다. .onDisappear에서 러닝이 시작되지 않은 경우에만 트래킹을 중단하도록 했다.
locationService가 private라 VM에 함수를 추가했다.
1
2
3
4
// RunViewModel
func cancelTracking() {
    locationService.stopTracking()
}
startCountdown()에서 PFDView로 전환되기 직전에 didStartFlight = true로 세팅한다.
1
2
3
4
5
6
7
} else {
    countdownActive = false
    runViewModel.updatePhase(.cruise)
    runViewModel.start()
    didStartFlight = true  // 정상 흐름으로 PFD 진입
    runViewModel.navigationPath.append(.pfd)
}
.onDisappear에서 didStartFlight가 false인 경우에만 트래킹을 중단한다.
1
2
3
4
5
6
7
@State private var didStartFlight = false

.onDisappear {
    if !didStartFlight {
        runViewModel.cancelTracking()
    }
}
didStartFlight가 true인 경우, 즉 ROTATE를 눌러 PFDView로 넘어가는 정상 흐름에서는 트래킹을 중단하지 않는다.
그리고 하단에 있던 3, 2, 1 시그널 강도에 대한 내용은 필요 없을듯 해서 지워주었다.