3주차 과제 (2)
Lv.2
Todo 추가 및 완료 기능 구현하기 (TodoListViewController) 키워드 : UIAlertController, UISegmentedControl**
- Todo 추가하기 기능
- Lv1에서 만든 Todo 추가 버튼을 이용해주세요.
- UIAlertController를 활용해서 할 일 추가 UI 및 기능을 구현해보세요. (Closure 등을 사용해서 Action을 추가해보세요.)
- 새로운 UI인 UIAlertController를 찾아보고 적용해봅시다.
- 예시)
- 로그인을 위한 회원정보 데이터 받아오기 예시
- Alert안에 TextField 구현하기
- iOS 입문 단계 강의에서 UIAlertController를 따로 다루지 않기에, 아래 개발자 공식문서를 참고하여 얼럿을 구현해봅니다. UIAlertController | Apple Developer Documentation
- 예시)
- Todo 완료하기 기능
- 버튼 혹은 UISegmentedControl을 활용, Todo의 완료 상태를 완료/미완료 상태로 변경합니다.
- UIButton을 활용
- UISwitch를 활용 (예시에 적용된 컴포넌트)
- 할일을 나타내는 Todo의 완료/미완료 상태에 따라 UI를 변경해주세요.
- 할일 Title 옆에
완료라는 표시를 붙여줄 수도 있겠네요!
- 할일 Title 옆에
- 버튼 혹은 UISegmentedControl을 활용, Todo의 완료 상태를 완료/미완료 상태로 변경합니다.
1. UIAlertController 사용하기.
1
2
3
4
5
6
7
8
9
10
11
12
13
14
15
16
17
18
19
20
func makeAlert () {

        let alert = UIAlertController(title: "Table View 추가해보기", message: "내용을 입력해주세요", preferredStyle: .alert)

        let ok = UIAlertAction(title: "OK", style: .default, handler: { [self] _ in // ok를 눌렀을때 내가 텍스트 필드에 입력한 내용을 등록하게 한다.
            lists.append(ToDoModel(id: id, title: alert.textFields?[0].text ?? "", isComplete: false)) // 배열에 등록
            tableView.reloadData() // 테이블뷰 갱신
            id += 1 }) // id 1씩 추가

        let cancel = UIAlertAction(title: "Cancel", style: .cancel)
        alert.addTextField { (textField: UITextField!) in
                    textField.placeholder = "여기에 입력해주세요"
                    textField.autocorrectionType = .no
                    textField.spellCheckingType = .no
                }
        alert.addAction(ok)
        alert.addAction(cancel)

        self.present(alert,animated: false)
    }
alert를 호출 하는 함수를 별도로 구현을 해주었다.
각각의 action을 오브젝트 화 해주었다.
해당 함수를 호출을 하게 되면 아래와 같이 뜬다.
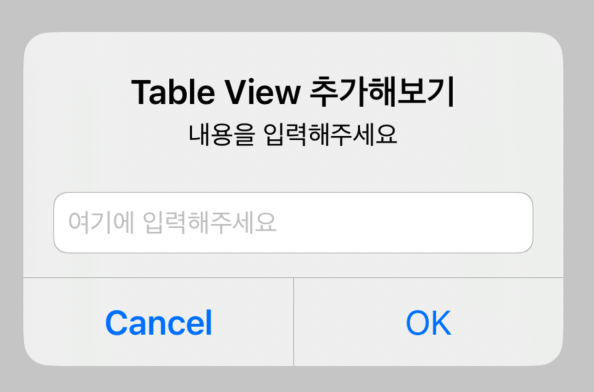
작동 확인도 완료
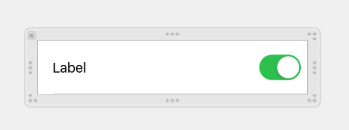
2. UISwitch 사용
코드로 switch를 구현했기에 Storyboard에서는 삭제했다.
1. 사용해보기
cell 을 구성하는 함수로 가서
1
2
3
4
5
 let finSwitch = UISwitch()
    cell.textLabel?.text = lists[indexPath.row].title
    finSwitch.setOn(false, animated: true)
    finSwitch.tag = indexPath.row
    cell.accessoryView = finSwitch
이렇게 적어준다.
- setOn : 처음에 어떤상태에서 보여질지?
- 난 on이되면 다했다고 할거기 때문에 false로 시작한다.
- tag : 태그를 지정해둔다. 나중에 쓸것같아서 index맞게 지정 해두었다.
- accessoryView : 특정 버튼이나 이런걸 추가하기 위해서 사용.
확인 완료
2. true / false 에 따라 표현해보기.
현재는 추가만 해둔 상태인데, 이걸 통해서 true 즉 완료했을때 텍스트가 텍스트 가 되도록 해보자.
1
2
3
4
5
6
7
8
9
10
11
12
13
14
15
16
17
18
19
20
21
func tableView(_ tableView: UITableView, cellForRowAt indexPath: IndexPath) -> UITableViewCell {
        let cell = tableView.dequeueReusableCell(withIdentifier: "TodoList", for: indexPath)
        let finSwitch = UISwitch()

        cell.textLabel?.text = lists[indexPath.row].title
        finSwitch.setOn(false, animated: true)
        finSwitch.tag = indexPath.row
        // new
        finSwitch.addTarget(self, action: #selector(self.switchChanged), for: .valueChanged)
        cell.accessoryView = finSwitch

        return cell
    }

    @objc func switchChanged(_ sender : UISwitch) {
        if sender.isOn {
            print("on")
        } else {
            print("off")
        }
    }
addtarget을 해줌으로써 해당 스위치가 작동했을때 특정한 기능을 수행하게 한다.
함수는 별도로 아래 처럼 지정해줘야한다.
지금은 테스트를 위해 on/off가 출력되게한다.
잘된다.
이것저것 시도를 해보다가 문제점을 하나 발견했다.
1
2
3
4
5
6
7
8
9
10
11
12
func tableView(_ tableView: UITableView, cellForRowAt indexPath: IndexPath) -> UITableViewCell {
        let cell = tableView.dequeueReusableCell(withIdentifier: "TodoList", for: indexPath)
        let finSwitch = UISwitch()

        cell.textLabel?.text = lists[indexPath.row].title
        finSwitch.setOn(false, animated: true)
        finSwitch.tag = indexPath.row
        finSwitch.addTarget(self, action: #selector(self.switchChanged), for: .valueChanged)
        cell.accessoryView = finSwitch

        return cell
    }
여기서 cell을 리턴할때마다 setOn을 사용해서 그런지.
만들고나서 다시 만들때 false로 돌아가지는 경우를 발견하였다.
하지만 지우고 테스트를 해도 바뀌지 않았다.
tableView에 대해 여러 자료를 찾다보면
Custom Table View로 하는경우가 많던데.
이참에 이걸 배워볼겸 코드를 뜯는것도 나쁘지 않을것 같다.
어쩐지 너무 잘풀렸다 ㅋㅋ
3. Cell Design
Cell을 Custom 하고자 새롭게 파일을 만들었다.
디자인을 해주었고 제약도 걸어 주었다.
1
2
3
4
5
6
7
8
9
10
11
12
13
14
15
16
17
18
19
20
21
22
23
24
import UIKit

class ToDoListCell: UITableViewCell {

    @IBOutlet weak var toDoView: UIView!

    @IBOutlet weak var toDoLabel: UILabel!


    @IBOutlet weak var finSwitch: UISwitch!

    override func awakeFromNib() {
        super.awakeFromNib()
        // Initialization code
    }

    override func setSelected(_ selected: Bool, animated: Bool) {
        super.setSelected(selected, animated: animated)

        // Configure the view for the selected state
    }


}
필요한것들은 전부 outlet을 만들어 주었다.
4. Custom Cell 연결하기.
TableVC 로 돌아와서
viewDidload() 에 아래와 같이 내가 만든 셀을 등록 해주었다.
tableView.register(UINib(nibName: Constants.cellName, bundle: nil), forCellReuseIdentifier: Constants.cellIdentifier)
그리고 tableView함수 역시 바꿔 주었다.
1
2
3
4
5
6
7
 func tableView(_ tableView: UITableView, cellForRowAt indexPath: IndexPath) -> UITableViewCell {
        let cell = tableView.dequeueReusableCell(withIdentifier: Constants.cellIdentifier, for: indexPath) as! ToDoListCell

        cell.toDoLabel.text = lists[indexPath.row].title

        return cell
    }
그리고 실행하니 이게 웬걸? nil 이떠버린다.
뭔가 제대로 된 값을 가져오지 못한다는 것인데, 이부분을 한번 해결해보자.
뭔가 꼬인거같아서 파일을 지웠다가 다시 만드니 잘된다.
5. 다시 switch on/off일때 기능 구현
몇시간동안 검색하다가 드디어 찾아내었다. 감격…
우선 스위치가 작동할때 내가 지정한 함수가 트리거 되게 하는 cell.finSwitch.addTarget(self, action: #selector(changeMode), for: .valueChanged) 를 적어주었다.
1
2
3
4
5
6
7
8
9
10
11
12
13
@objc func changeMode (sender : UISwitch) {
        if let currentCell = tableView.cellForRow(at: IndexPath(row: sender.tag, section: 0)) as? ToDoListCell {
            currentCell.toDoLabel.attributedText = currentCell.toDoLabel.text?.strikeThrough()
        }
}

extension String {
    func strikeThrough() -> NSAttributedString {
        let attributeString =  NSMutableAttributedString(string: self)
        attributeString.addAttribute(NSAttributedString.Key.strikethroughStyle, value: NSUnderlineStyle.single.rawValue, range: NSMakeRange(0,attributeString.length))
        return attributeString
    }
}
현재 스위치가 토글이 될때의 indexpath에 해당하는 cell 정보만 가져올 수 있으면 바꿀 수 있다고 생각했는데, 생각보다 그것을 찾아내는 과정이 너무 어려웠다. 죄다 on/off 에대해 단순히 print만 하고 있었다.
해당 메서드를 통해서 취소선을 드디어 만들어내었다. 이제 취소선도 false일때 없애야 하므로 코드를 더 수정한다.
1
2
3
4
5
6
7
8
9
10
11
12
13
14
15
16
17
18
19
20
21
22
23
24
25
@objc func changeMode (sender : UISwitch) {
        guard let currentCell = tableView.cellForRow(at: IndexPath(row: sender.tag, section: 0)) as? ToDoListCell else { return }
        if sender.isOn {
            currentCell.toDoLabel.attributedText = currentCell.toDoLabel.text?.strikeThrough()

        } else {
            currentCell.toDoLabel.attributedText = currentCell.toDoLabel.text?.removeStrike()

        }

    }

extension String {
    func strikeThrough() -> NSAttributedString {
        let attributeString =  NSMutableAttributedString(string: self)
        attributeString.addAttribute(NSAttributedString.Key.strikethroughStyle, value: NSUnderlineStyle.single.rawValue, range: NSMakeRange(0,attributeString.length))
        return attributeString
    }

    func removeStrike () -> NSAttributedString {
        let attributeString = NSMutableAttributedString(string: self)
        attributeString.removeAttribute(NSAttributedString.Key.strikethroughStyle, range: NSMakeRange(0, attributeString.length))
        return attributeString
    }
}
6. 문제 해결
현재 가장 큰 문제는 여러개를 추가하다보면 갑자기 스위치가 이상하게 되어버린다.
아무래도 reload하면서 문제가 생기는듯하다.
찾다가 하나의 글을 발견했는데, row를 제거하고 추가할때는 사용하면 안된다고한다.
그럼 어느 위치에 해야하는걸까..
어느 위치에둬도 매칭이 되지가 않는다. 그냥 DB에 연결해서 사용하는게 훨씬 나을것같다는 생각이 든다.