Clima (6)
extionsion을 사용하여 기능을 별도로 부여하기.
제일 하단에 만들어보자!
1
2
3
4
extension WeatherViewController : UITextFieldDelegate {

}
그리고 UITextFieldDelegate와 관련된 함수들을 모~두 extension안에 넣어준다!
관련된 함수를 어떻게 구별하는가?
기능적인 측면에서 생각을 해서 구별하였다. 그게 맞나 애매할땐
1
2
3
4
5
6
7
override func viewDidLoad() {
        super.viewDidLoad()

        weatherManager.delegate = self
        searchTextField.delegate = self
    }
이 위임자가 어떻게 되어있는지를 보고 좀 추론해서 정리하기도 했다.
이렇게 extension에 옮겨주니 다음과 같은 에러가 발생한다

뭐 간단하게 이야기하면 중복사용 했다는 것이다.
class로 올라가서 UITextFieldDelegate를 지워주자.
그럼 에러가 말끔하게 사라진다.
WeatherViewController가 extension에 UITextFieldDelegate를 사용하고 있기에 class에 있는것을 지워도 괜찮다!
그래서 중복사용이라고 떴던것이다.
1
2
3
4
5
6
7
8
9
10
11
12
13
14
15
16
17
18
19
20
21
22
23
24
25
26
27
28
29
30
31
32
extension WeatherViewController : UITextFieldDelegate {

    @IBAction func searchPressed(_ sender: UIButton) {
        searchTextField.endEditing(true)
        print(searchTextField.text!)
    }

    func textFieldShouldReturn(_ textField: UITextField) -> Bool {
        searchTextField.endEditing(true)
        print(searchTextField.text!)
        return true
    }

    func textFieldShouldEndEditing(_ textField: UITextField) -> Bool {
        if textField.text != "" {
            return true
        } else {
            textField.placeholder = "Type something Here"
            return false
        }
    }

    func textFieldDidEndEditing(_ textField: UITextField) {

        if let city = searchTextField.text {
            weatherManager.fetchWeather(cityName: city)
        }

        //Use searchTextField.text to get the weather for that city
        searchTextField.text = ""
    }
}
그럼 이와 똑같은 방법으로 WeatherManagerDelegate도 해보자
1
2
3
4
5
6
7
8
9
10
11
12
13
extension WeatherViewController : WeatherManagerDelegate {
    func didUpdateWeather(_ weatherManager:WeatherManager, weather : WeatherModel) {
        DispatchQueue.main.async{
            self.temperatureLabel.text = weather.temperatureString
            self.conditionImageView.image = UIImage(systemName: weather.conditionName)
        }
    }

    func didFailWithError(error: Error) {
        print(error)
    }
}
GPS기능을 사용해 현재 위치 리턴
우선 해당기능을 사용하기 위해선 Apple이 개발한 CoreLocation을 가져와야한다.
즉, import 해야한다는 것이다.
해보자
import CoreLocation
그리고 CoreLocationManager를 인스턴스화 한다.
let locationManager = CLLocationManager()
이 매니저가 현재 휴대폰의 현재 gps위치를 알려주는 역할을 한다.
그전에 먼저 트리거 해준다!
delegate와 마찬가지!
locationManager.requestWhenInUseAuthorization()
항상 내 위치를 허용하는건 안되니 내가 필요로 사용할때만 값을 가져오게 해야하기 때문이다.
그리고 이것으로 끝난게 아니다.
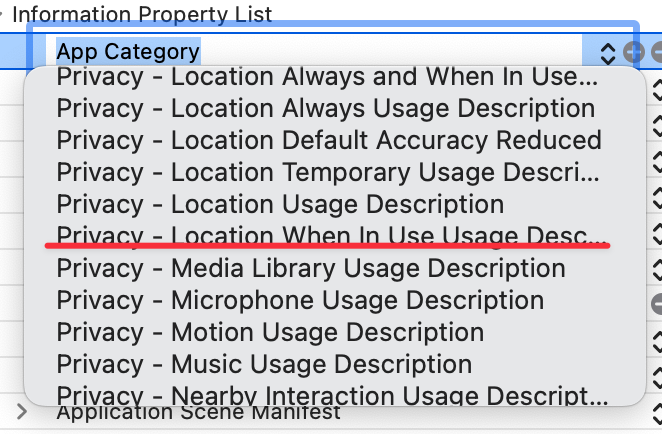
Info.plist를 확인하자.

보명 위와 같이 되어있는데, 여러 Key : Value 형식으로 되어 있다.
이 값들이 앱의 기본 설정을 결정한다!
새로 값을 하나 만들어 주어야하고, 쭉 내리다보면
Privacy - Location When In Use Usage Description 항목이 있다. 이걸 추가해주자!
value에는 다음과 같이 적었다.
We need your location to get the current weather for where you are.
우리가 이 정보가 왜 필요한지에대한 설명을 해주는 것이다.
실행을 해보면?
앱을 키자마자 우리가 어느 어플에서나 현위치를 확인할때 물어보던 그 창이 뜬다!
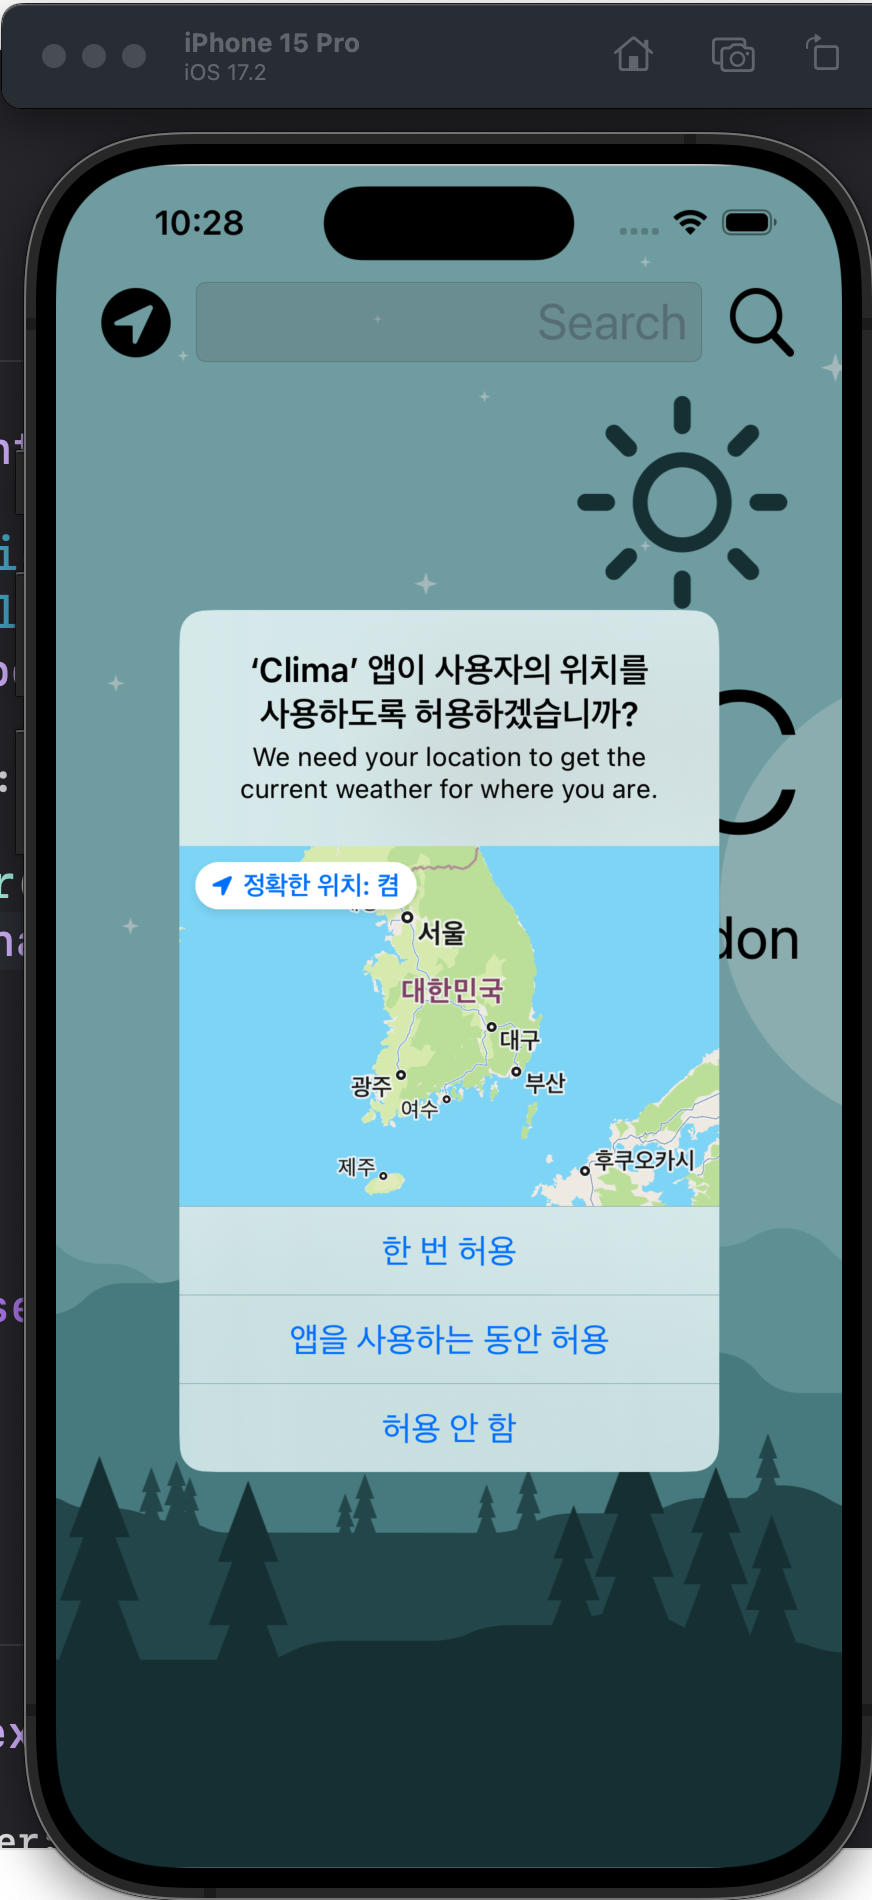
그리고 우리가 적었던 We need your location to get the current weather for where you are.
이 멘트도 보인다.
앱을 테스트 할때는 항상 허용으로 해두도록 하자.
그렇지 않으면 또 이리저리 설정을 해야해서 복잡해진다..
그렇게 유져의 동의를 얻었다면?
다시 코드로 돌아가서
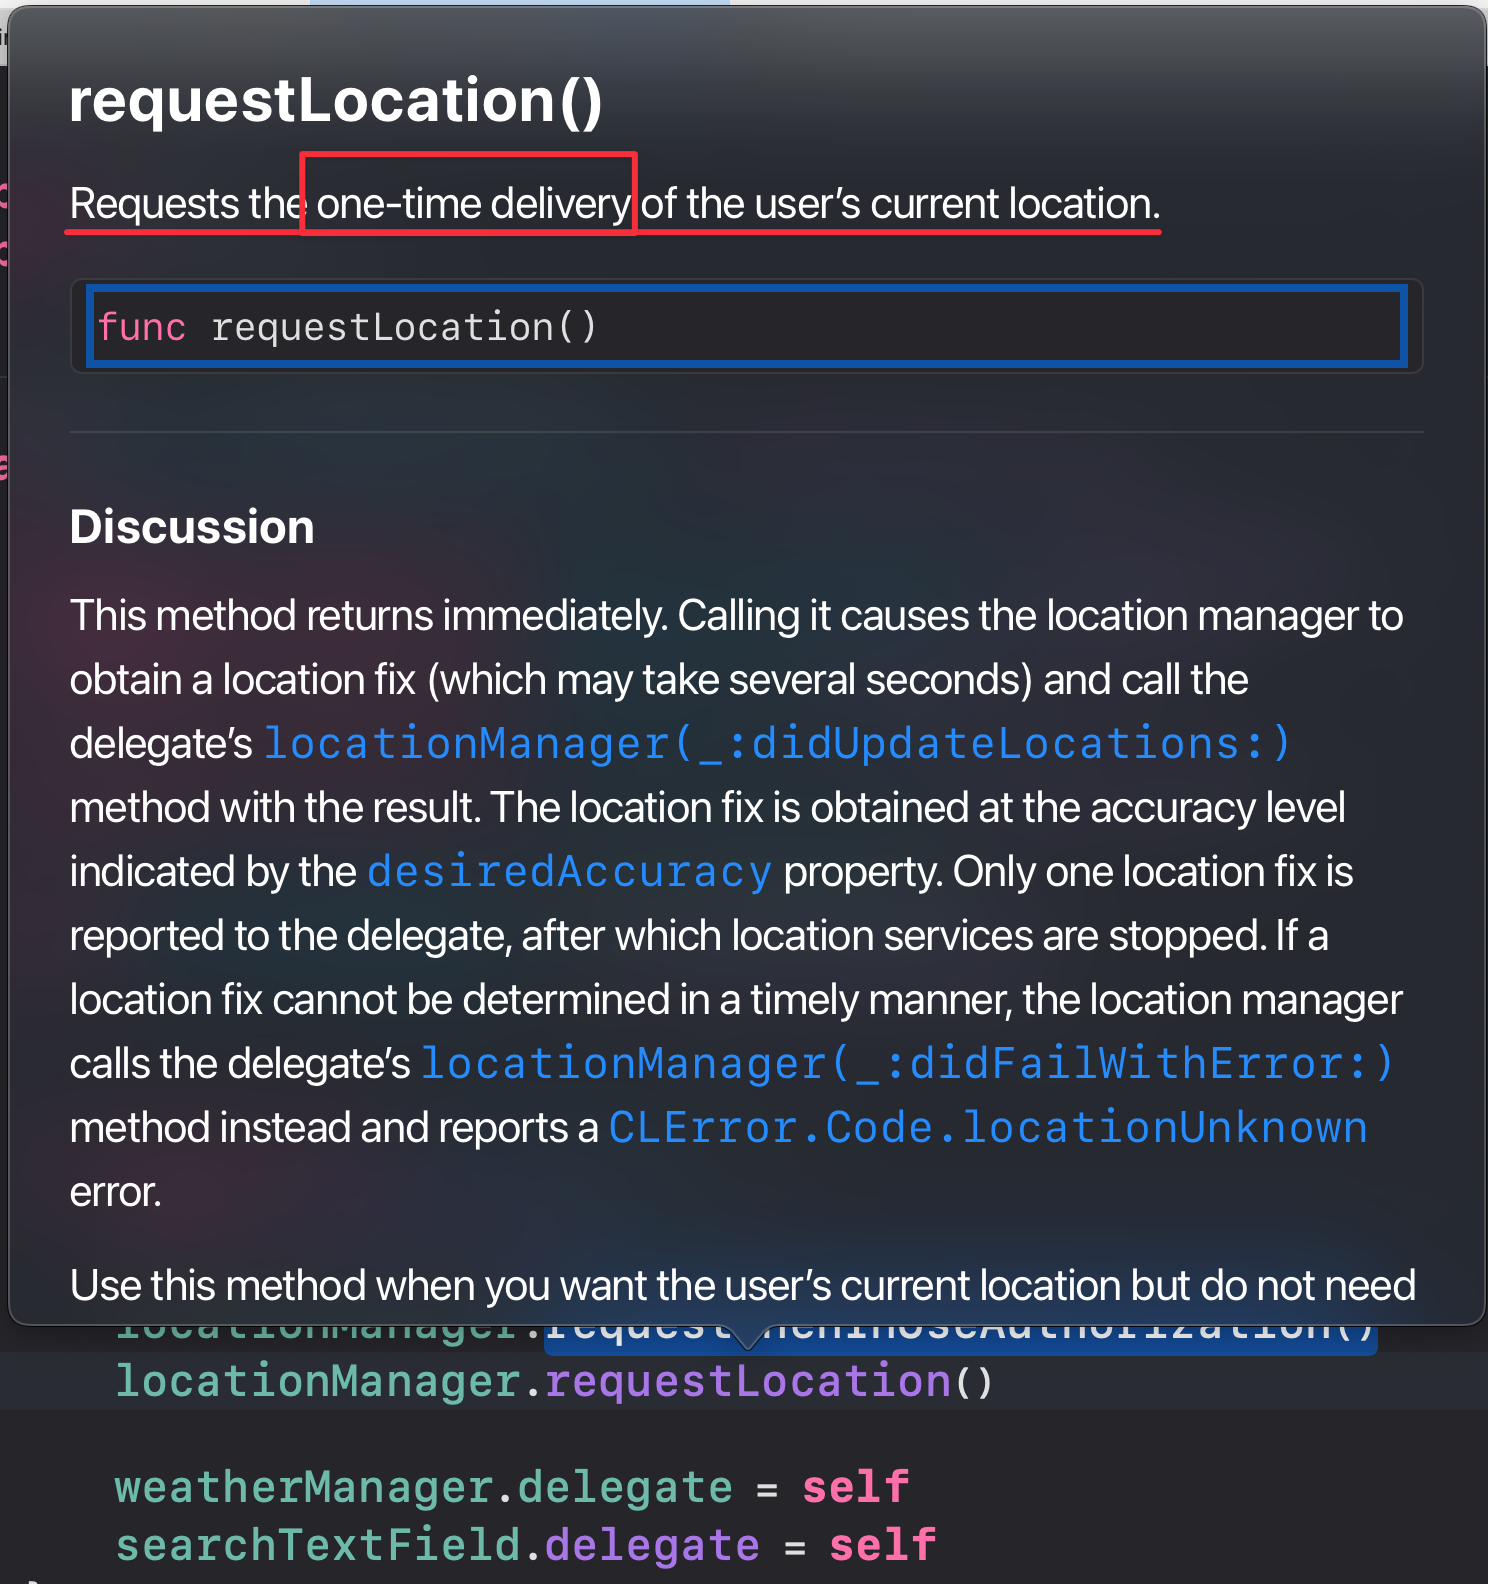
locationManager.requestWhenInUseAuthorization() 다음에 추가로 locationManager.requestLocation() 을 적어주자.
이녀석은 유져의 위치를 일회성으로 제공한다.
그런데 네비게이션 앱처럼 실시간으로 위치를 요청하려면? locationManager.startUpdatingLocation() 이걸 사용한다.
그렇다면 requestLocation을 사용했는데 위치를 어떻게 알아낼까?
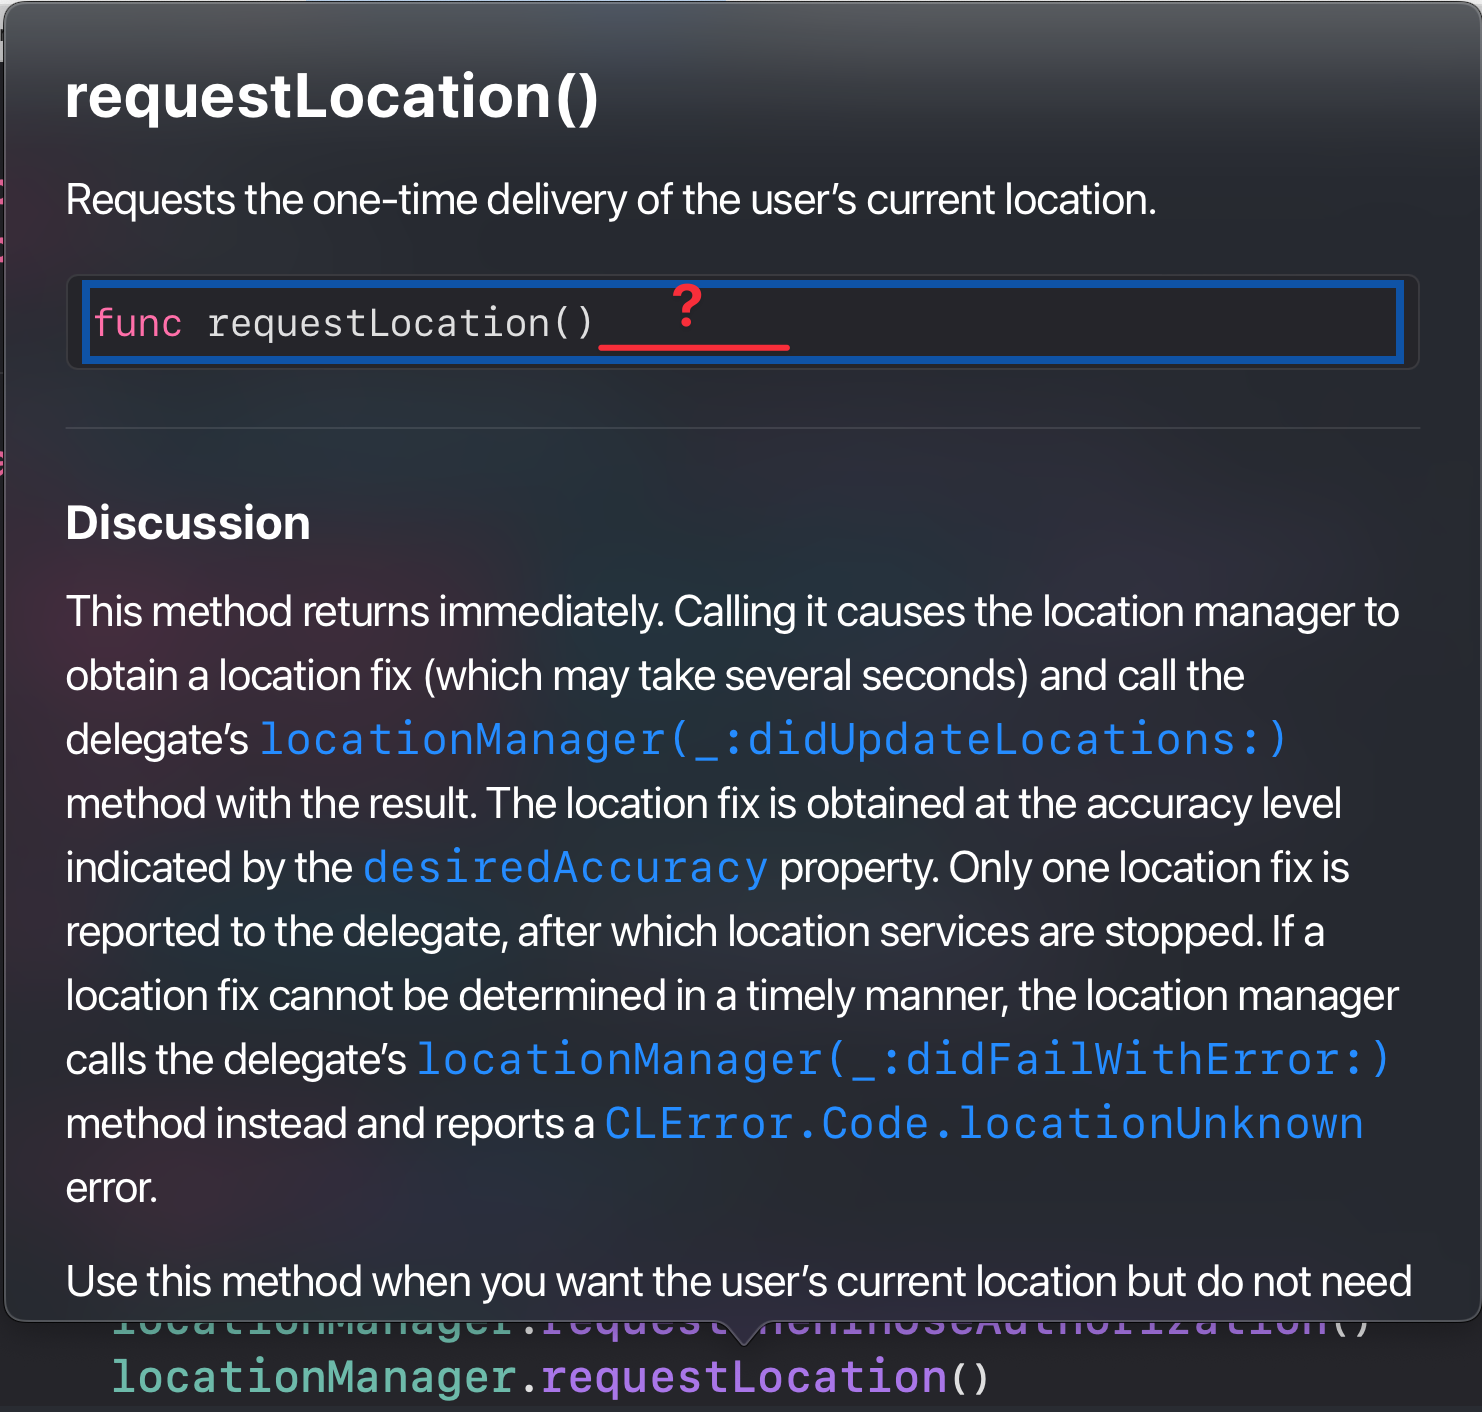
무슨 말이냐 하면, 리턴하는것이 없다?
그럼 우리가 사용하는 어플들은 어떻게 위치를 조회했던걸까?
방법이 있다.
그 아래를 잘 보면 locationManager(_:didUpdateLocations) 메서드를 사용하면된다.

해당 메서드는 다음과 같다
1
2
3
4
optional func locationManager(
    _ manager: CLLocationManager,
    didUpdateLocations locations: [CLLocation]
)
parameters
manager : The location manager object that generated the update event.
locations : An array of CLLocation objects containing the location data. This array always contains at least one object representing the current location. If updates were deferred or if multiple locations arrived before they could be delivered, the array may contain additional entries. The objects in the array are organized in the order in which they occurred. Therefore, the most recent location update is at the end of the array.
Challenge : 현위치를 출력하게 기능을 구현해보자.
강의에서 extension 사용을 해보라고 하였다.
extension을 사용하라는건 즉 프로토콜이 있다는 말인데, 옵션키를 누르면서 이것저것 메서드에 대해 눌러봤다.
CLLocationManager 에 대해 좀 읽어보던중 이 부분을 발견했다.
역시 프로토콜이 존재했다.
extension에 함수만 넣고 실행만 해봤는데 바로 팅겨버린다?
1
2
3
4
5
6
7
8
9
extension WeatherViewController : CLLocationManagerDelegate {

    func locationManager(_ manager: CLLocationManager, didUpdateLocations locations: [CLLocation]) {
        if let location = locations.first {
            print(location)
        }
    }

}
안에 코드 구성은 구글링을 해서 작성했다.
우선은 내힘으로 해봐야하기에 이것저것 검색을 좀 해봤다.

Delegate가 더 먼저 호출이 되어야 했다.
1
2
3
4
5
6
7
8
9
10
11
12
13
14
15
override func viewDidLoad() {
        super.viewDidLoad()


        weatherManager.delegate = self
        searchTextField.delegate = self
        locationManager.delegate = self

        locationManager.requestWhenInUseAuthorization()
        locationManager.requestLocation()


    }
그래서 이렇게 위에 먼저 호출하게 하였다.
그리고 실행을 해봤다.
또 팅긴다.

이번엔 해당 함수가 없어서 그런것같다. 함수를 추가해보자…
1
2
3
4
5
6
7
8
9
10
11
12
13
extension WeatherViewController : CLLocationManagerDelegate {

    func locationManager(_ manager: CLLocationManager, didUpdateLocations locations: [CLLocation]) {
        if let location = locations.first {
            print(location)
        }
    }

    func locationManager(_ manager: CLLocationManager, didFailWithError error: Error) {
        print(error)
    }

}
그리고 실행을 해보자.
일단은 출력이 된다. 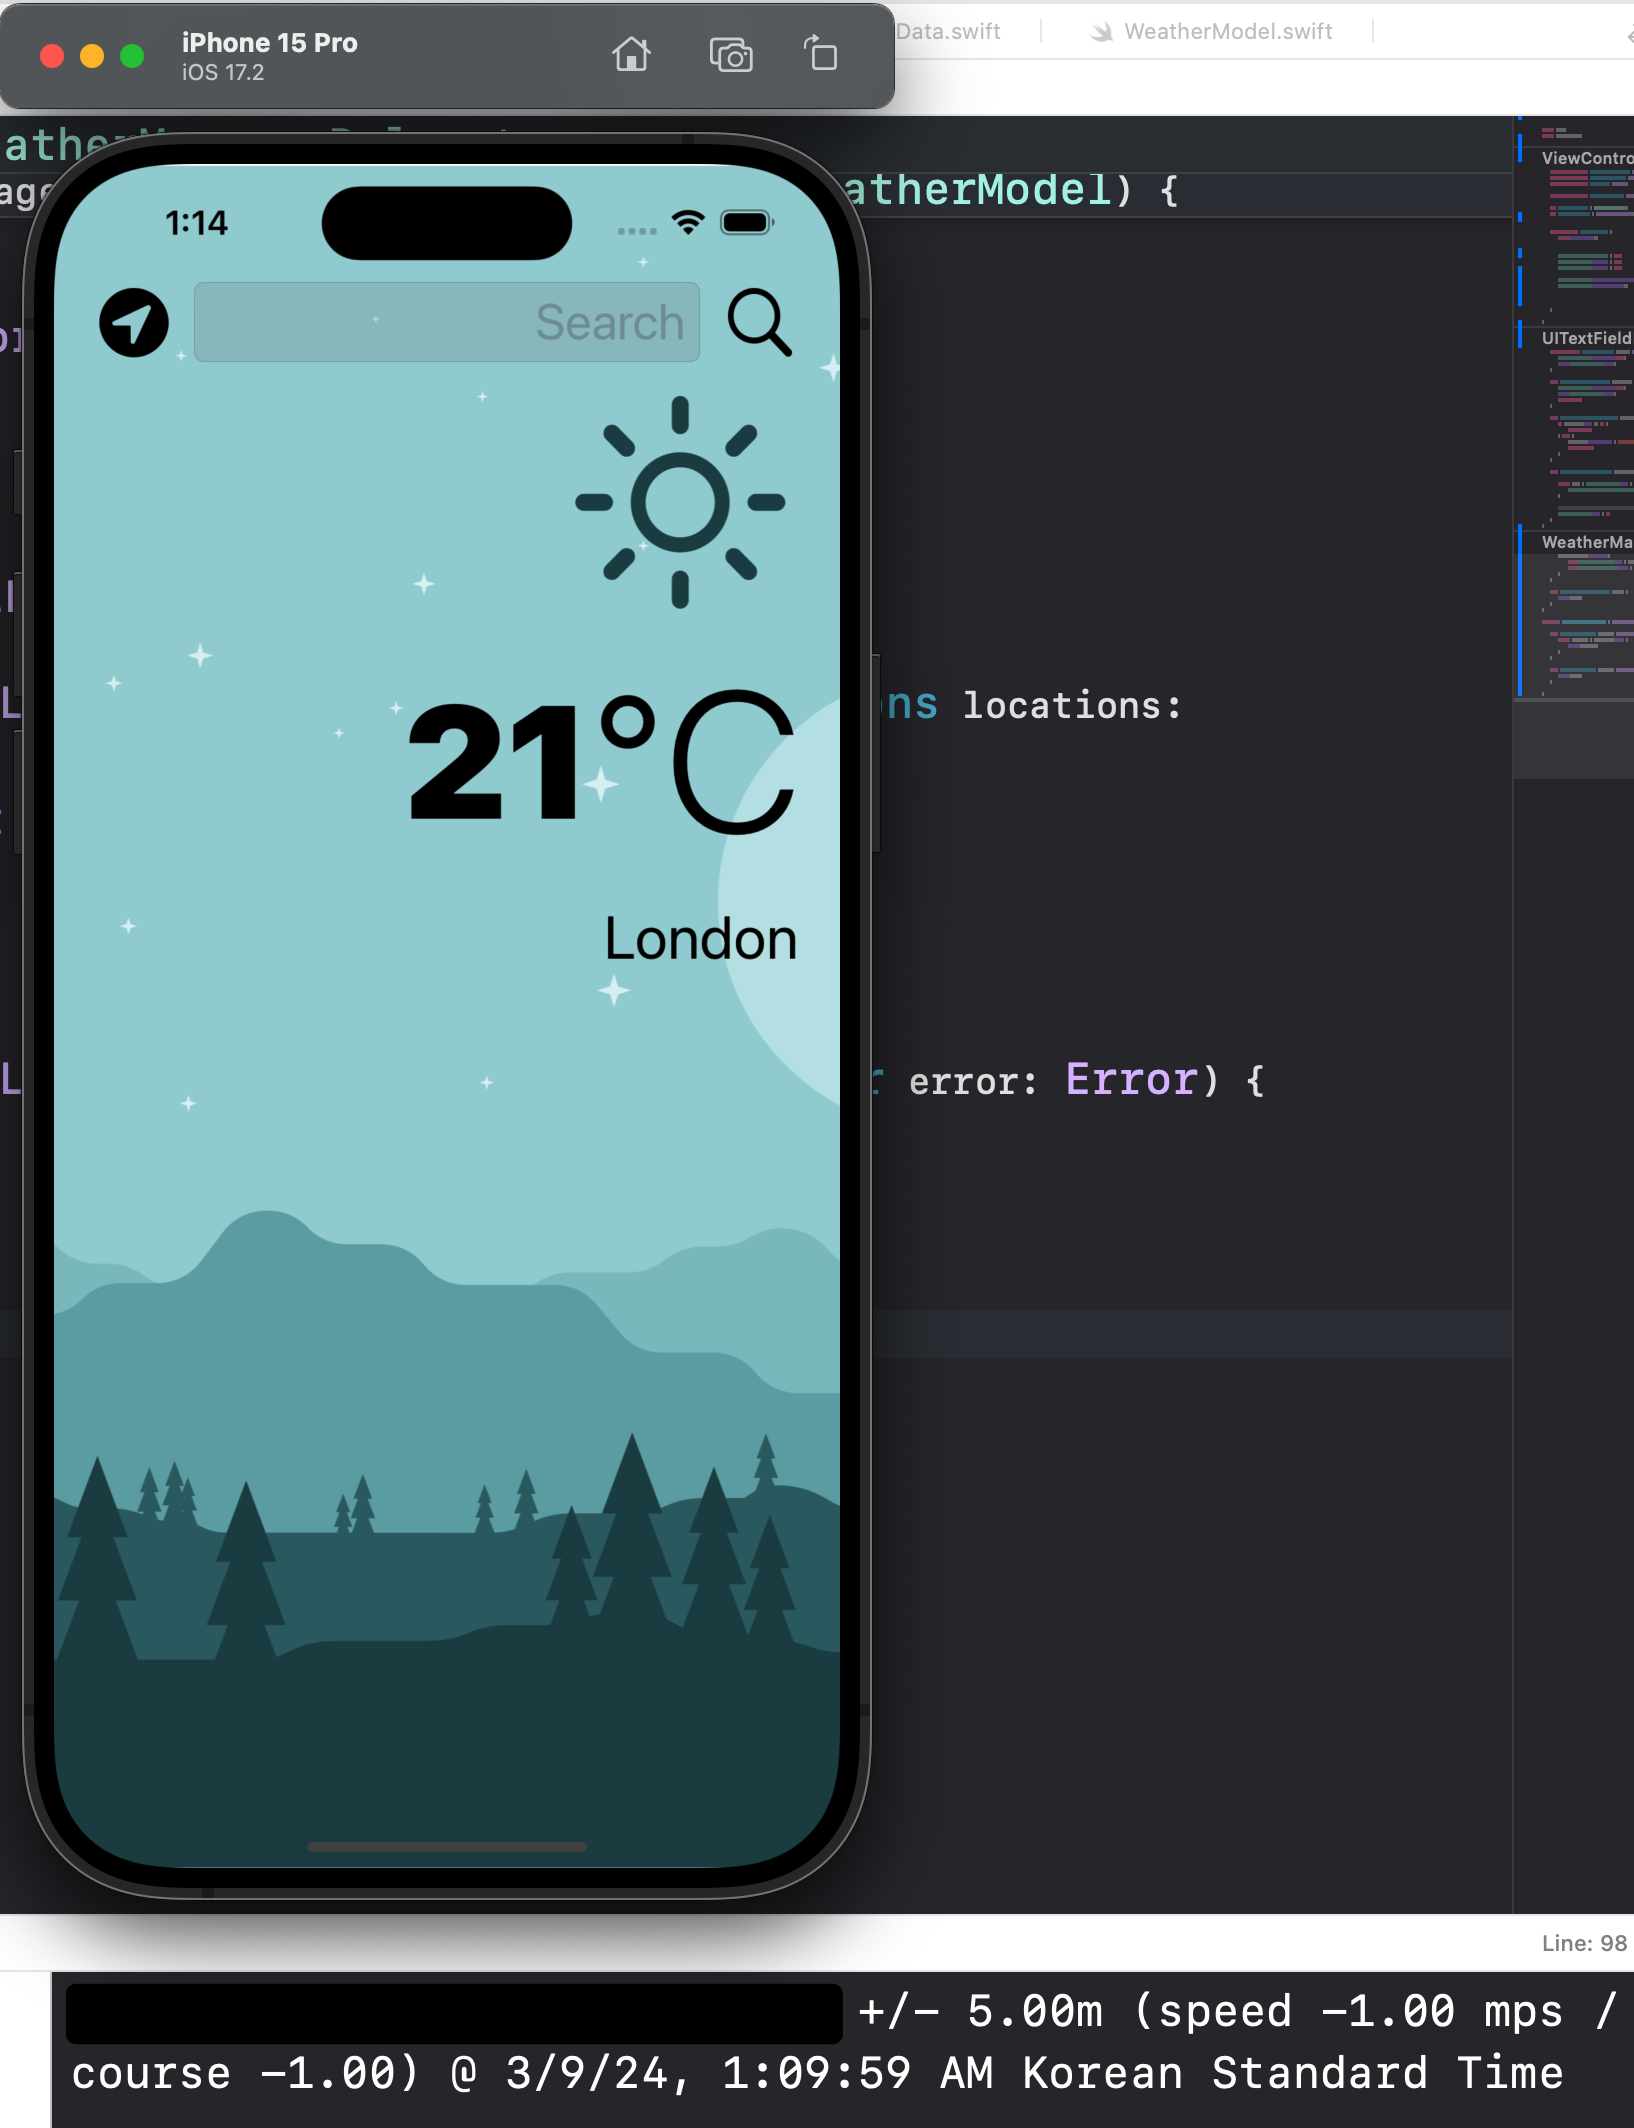
강의에선 이렇게 했다
1
2
3
extension WeatherViewController : CLLocationManagerDelegate {

}
우선 extension을 통해 CLLocationManagerDelegate을 채택했다.
그리고 똑같이 함수를 적었다.
1
2
3
4
5
6
7
8
extension WeatherViewController : CLLocationManagerDelegate {

    func locationManager(_ manager: CLLocationManager, didUpdateLocations locations: [CLLocation]) {
        print("Got location data")
    }


}
그리고 내가 간과했던것 콕 찝어주었다.
좀 제대로 읽어볼걸 그랬다…
역시나 강의에서도 delegate의 순서를 말해주었다.
1
2
3
4
5
6
7
8
9
10
11
12
override func viewDidLoad() {
        super.viewDidLoad()

        locationManager.delegate = self
        locationManager.requestWhenInUseAuthorization()
        locationManager.requestLocation()

        weatherManager.delegate = self
        searchTextField.delegate = self

    }
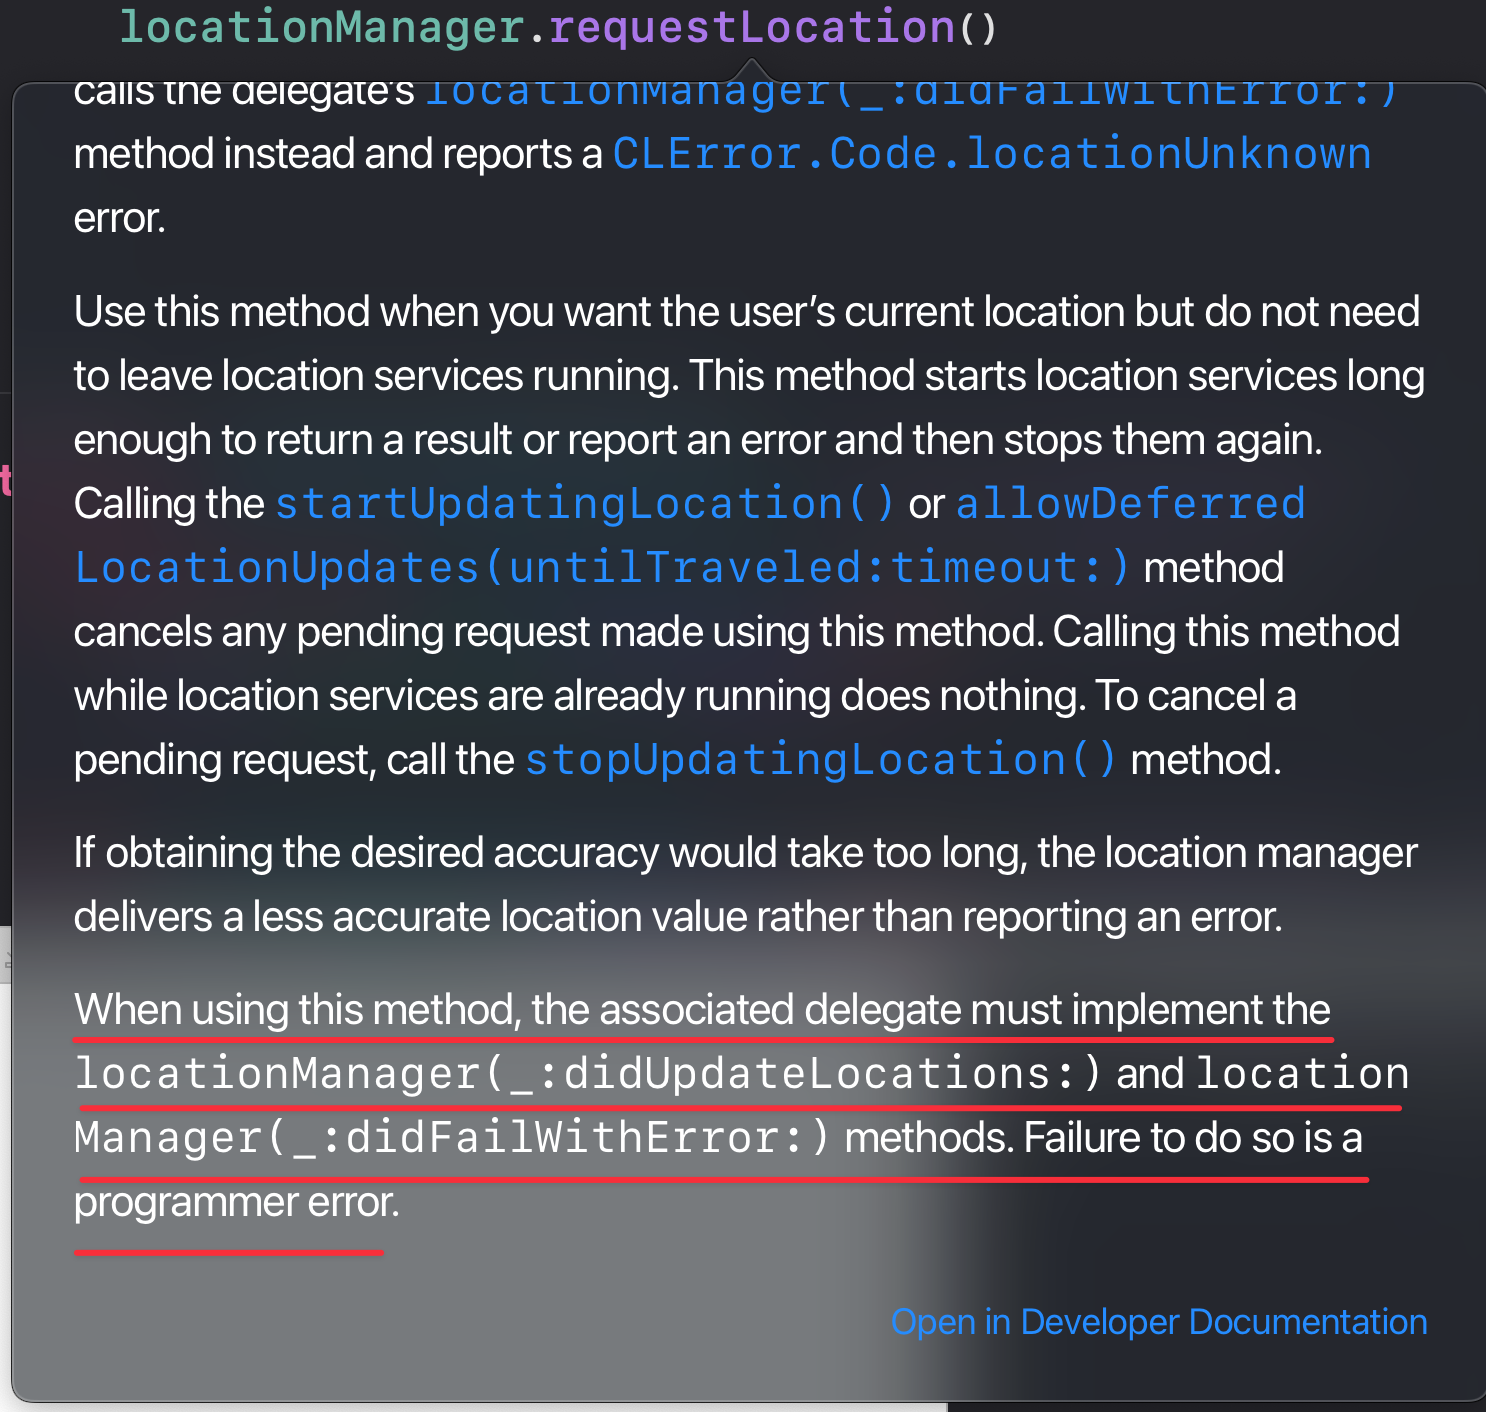
그리고 위의 밑줄친대로 didFailWithError 이것도 구현해주자.
1
2
3
4
5
6
7
8
9
10
extension WeatherViewController : CLLocationManagerDelegate {

    func locationManager(_ manager: CLLocationManager, didUpdateLocations locations: [CLLocation]) {
        print("Got location data")
    }

    func locationManager(_ manager: CLLocationManager, didFailWithError error: Error) {
        print(error)
    }
}
실행하니 잘 나왔다.

이렇게 출력만 하게 하는것이었나보다…
내가 조금 더 찾아보고 하긴 했지만 강의 흐름을 따라 다시 적어본다.
이제 위도 경도 이런정보를 출력해보자
CLLocation 배열에서 제일 마지막 값을 호출하면 가장 정확한 값이 나올것이다. - 이부분은 좀더 찾아보고 정리해야할듯하다.
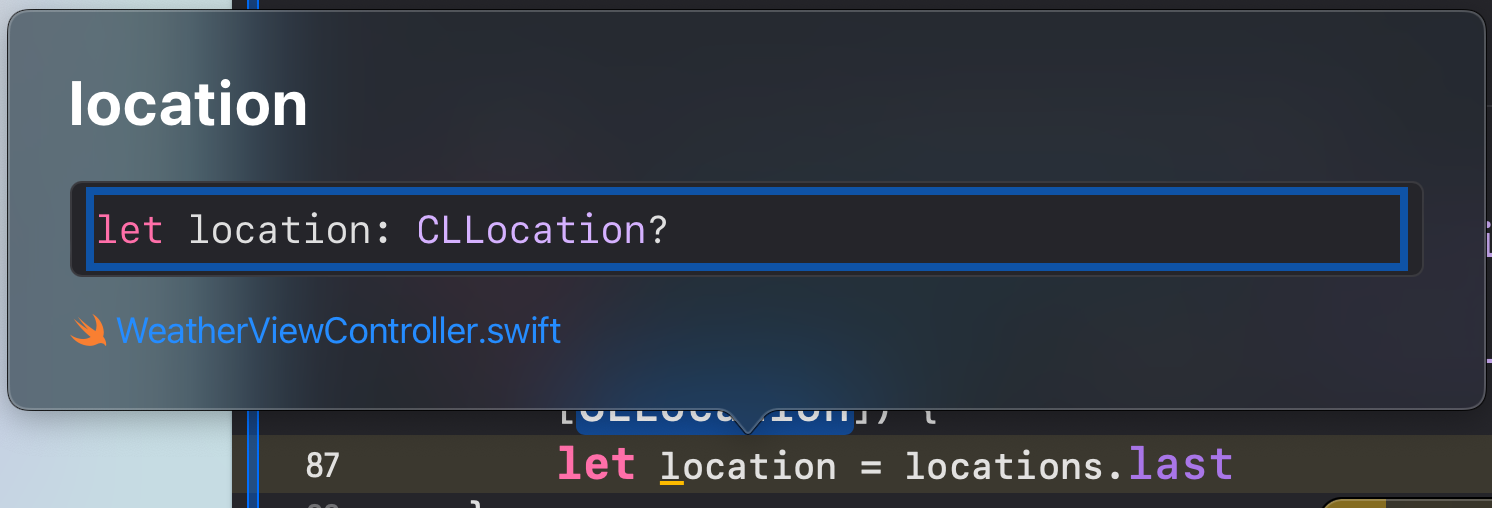
다음과 같은 경고가 뜬다?

타입을 보니 옵셔널이다. 일단 옵셔널 바인딩을 해주자.
그리고 위도와 경도를 출력하게 해보았다.
1
2
3
4
5
6
7
8
9
10
11
12
13
14
15
extension WeatherViewController : CLLocationManagerDelegate {

    func locationManager(_ manager: CLLocationManager, didUpdateLocations locations: [CLLocation]) {
        if let location = locations.last {
            let lat = location.coordinate.latitude
            let lon = location.coordinate.longitude
            print(lat)
            print(lon)
        }
    }

    func locationManager(_ manager: CLLocationManager, didFailWithError error: Error) {
        print(error)
    }
}
실행해보니 잘나온다.
혹시라도 location을 테스트 해보고싶다면?
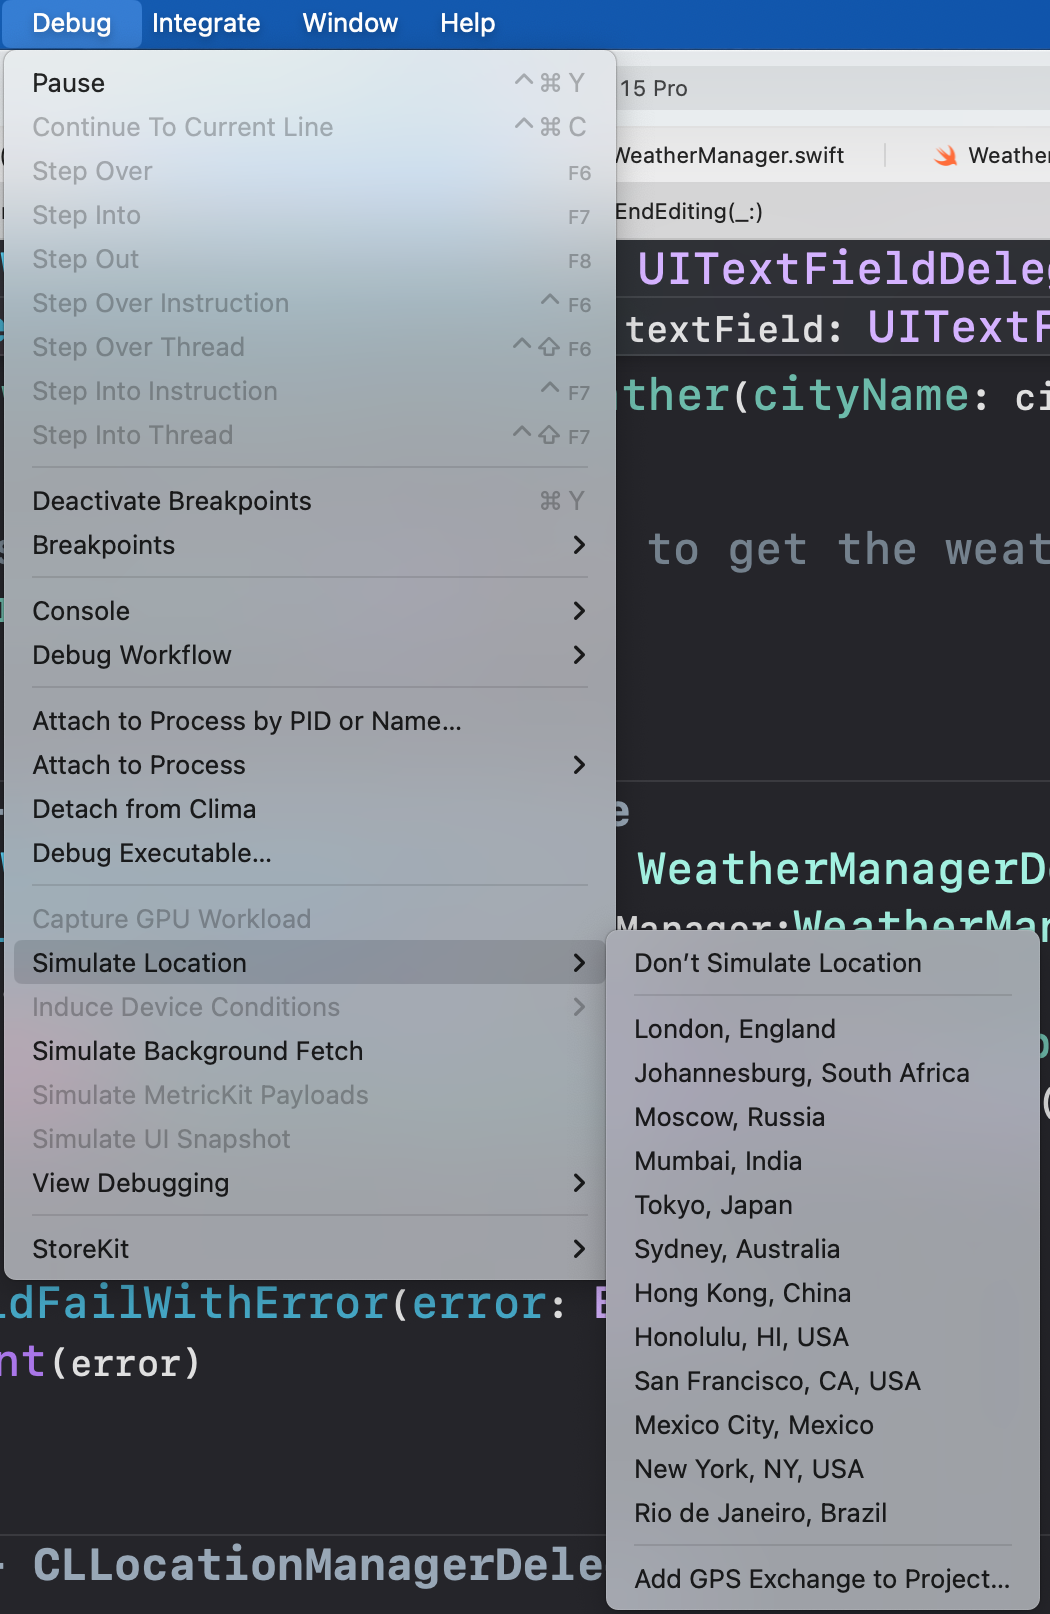
이걸 사용해보자.
그리고 현재 이 변수들은 api의 JSON과 같은 변수명을 사용했다.
우선 weatherURL을 복사하자.
그리고 https://api.openweathermap.org/data/2.5/weather?appid=b5005bab606b11d2b82b3dae1b2bc221&units=metric&lat=51&lon=-0.1
이렇게 뒤에 &를 붙여서 lat과 lon을 이용하여 테스트를 해보니
날씨 값이 나온다.
즉 우린 저걸 이용해서 현재 받은 좌표를 주소에 넘길것이다.
즉
1
2
3
4
func fetchWeather (cityName : String) {
        let urlString = "\(weatherURL)&q=\(cityName)"
        performRequest(with: urlString)
    }
이 함수를 다듬어 주면 된다.
한번 해보자.
Challenge : 새로추가한 코드가 작동이 되게 해보자
1
2
3
4
5
6
7
8
9
10
11
12
13
14
extension WeatherViewController : CLLocationManagerDelegate {

    func locationManager(_ manager: CLLocationManager, didUpdateLocations locations: [CLLocation]) {
        if let location = locations.last {
            let lat = location.coordinate.latitude
            let lon = location.coordinate.longitude
            weatherManager.fetchWeather(latitude: lat, longitude: lon) // new
        }
    }

    func locationManager(_ manager: CLLocationManager, didFailWithError error: Error) {
        print(error)
    }
}
우선 필요한값을 모델에 만들어준다.
1
2
3
4
5
6
7
struct WeatherModel {

    let conditionId : Int
    let cityName : String
    let temperature : Double
    let latitude : Double
    let longitude : Double
그리고 weatherData에도 필요한값을 만들어 주었다.
여기엔 json과 변수를 맞춰주어야한다.
1
2
3
4
5
6
7
8
9
10
11
12
13
14
15
16
17
18
19
20
21
struct WeatherData : Codable {
    let name : String
    let main : Main
    let weather : [Weather]
    let coord : coord //new
}

struct Main : Codable {
    let temp : Double
}

struct Weather : Codable {
    let description : String
    let id : Int
}

struct coord : Codable { //new
    let lon : Double
    let lat : Double
}
그리고 JSON 값을 가지고오는 코드 부분을 수정해주었다.
1
2
3
4
5
6
7
8
9
10
11
12
13
14
15
16
17
18
19
20
21
func parseJSON(_ weatherData: Data) -> WeatherModel? {
        let decoder = JSONDecoder()
        do {
            let decodedData = try decoder.decode(WeatherData.self, from: weatherData)
            let id = decodedData.weather[0].id
            let temp = decodedData.main.temp
            let name = decodedData.name
            let lat = decodedData.coord.lat //new
            let lon = decodedData.coord.lon //new


            let weather = WeatherModel(conditionId: id, cityName: name, temperature: temp, latitude: lat, longitude: lon) // modified
            return weather

            print(weather.temperatureString)
        } catch { // JSON Decoder Fail
            delegate?.didFailWithError(error: error)
            return nil
        }

    }
그리고 함수이름은 같지만 파라미터가 다르게 하여 다음과 같이 만들었다.
1
2
3
4
5
6
7
8
9
func fetchWeather (latitude: Double, longitude: Double) { //new
        let urlString = "\(weatherURL)&lat=\(latitude)&lon=\(longitude)"
        performRequest(with: urlString)
    }

func fetchWeather (cityName : String ) {
        let urlString = "\(weatherURL)&q=\(cityName)"
        performRequest(with: urlString)
    }
실행해보았다.
좀 딜레이가 있지만 된다!
강의와 비교해보자
1
2
3
4
func fetchWeather (latitude: CLLocationDegrees, longitude: CLLocationDegrees) {
        let urlString = "\(weatherURL)&lat=\(latitude)&lon=\(longitude)"
        performRequest(with: urlString)
    }
이것만 했다.
생각해보니. 저 json에서 가져올 필요가 전혀없었다.
왜냐하면 저 json은 우리가 도시를 검색할때 쓰기 때문이다 ㅠ
아 멍청했다.
Challenge 이젠 도시명이 나오게 하고 좌측 상단 버튼을 눌렀을때 현재 위치가 나오게 해보자!
우선 이부분에서 label이 업데이트 되도록 해보려고 했다
1
2
3
4
5
6
7
8
9
10
11
12
13
extension WeatherViewController : WeatherManagerDelegate {
    func didUpdateWeather(_ weatherManager:WeatherManager, weather : WeatherModel) {
        DispatchQueue.main.async{
            self.temperatureLabel.text = weather.temperatureString
            self.conditionImageView.image = UIImage(systemName: weather.conditionName)
            self.cityLabel.text = weather.cityName // new
        }
    }

    func didFailWithError(error: Error) {
        print(error)
    }
}
추가하니 잘된다.
그리고 IBAction을 만들고
1
2
3
@IBAction func locationPressed(_ sender: UIButton) {
        locationManager.requestLocation()
    }
다음과 같이 위치만 요청하게 했다.
1
2
3
4
5
6
7
8
9
10
11
12
13
14
15
extension WeatherViewController : CLLocationManagerDelegate {

    func locationManager(_ manager: CLLocationManager, didUpdateLocations locations: [CLLocation]) {
        if let location = locations.last {
            locationManager.startUpdatingLocation() //new
            let lat = location.coordinate.latitude
            let lon = location.coordinate.longitude
            weatherManager.fetchWeather(latitude: lat, longitude: lon)
        }
    }

    func locationManager(_ manager: CLLocationManager, didFailWithError error: Error) {
        print(error)
    }
}
startUpdatingLocation()를 통해 작동할때마다, 현재 위치를 업데이트 하게 해준다.
현재 문제점이라면, simulator에서 원래는 현위치로 받다가, debug로 위치를 임의대로 설정 할 수 있다고 했는데,
그 이후로 현위치 설정이 이상하게 안된다…
현위치를 가져오면서 자꾸만 다음과 같은 에러가 콘솔에 나오기 시작했다.
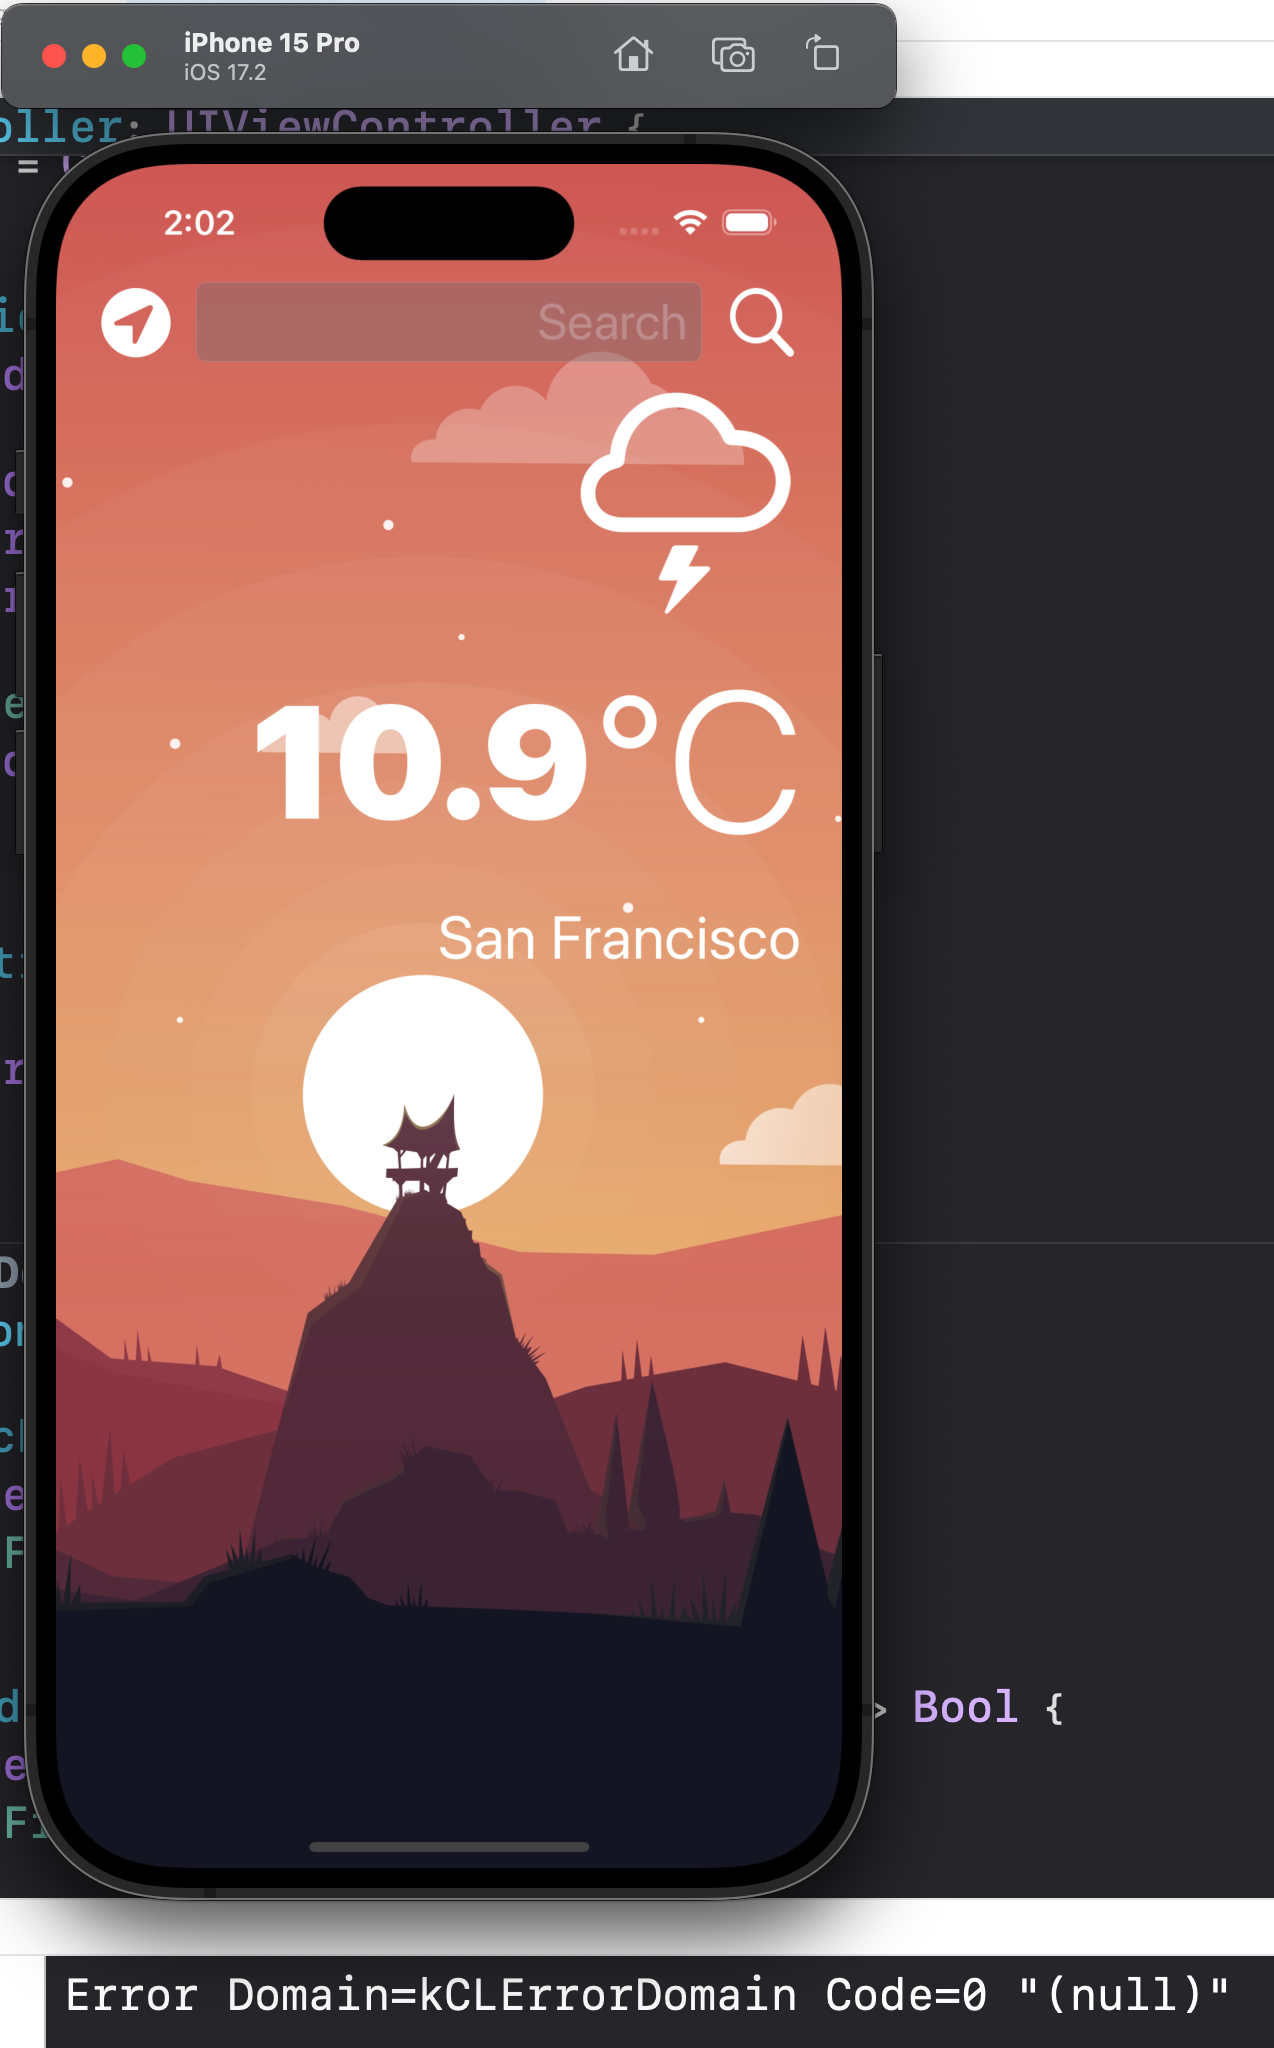
일단 여러모로 해보고있지만 안되고 있다….
공기계를 하나 구해서 현위치 테스트를 하니 잘된다.
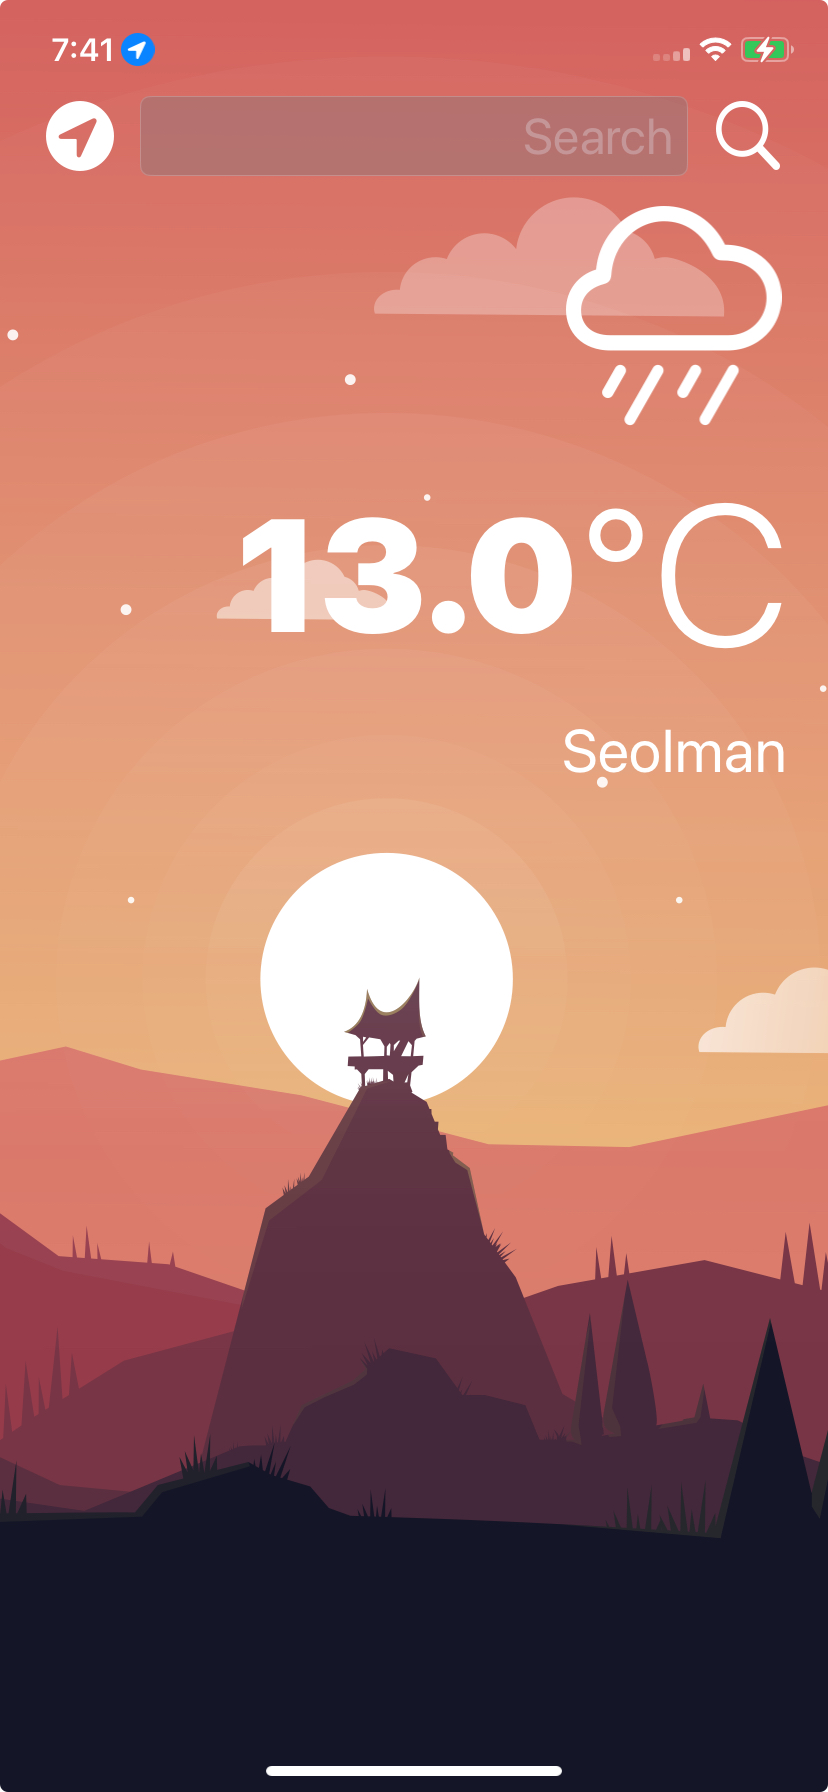
근데 Seolman 어디냐?
경도 위도로 찾아보니 얼추 근처로 나오긴하는데 처음보는 지명이다.