EggTimer (2)
Challenge! 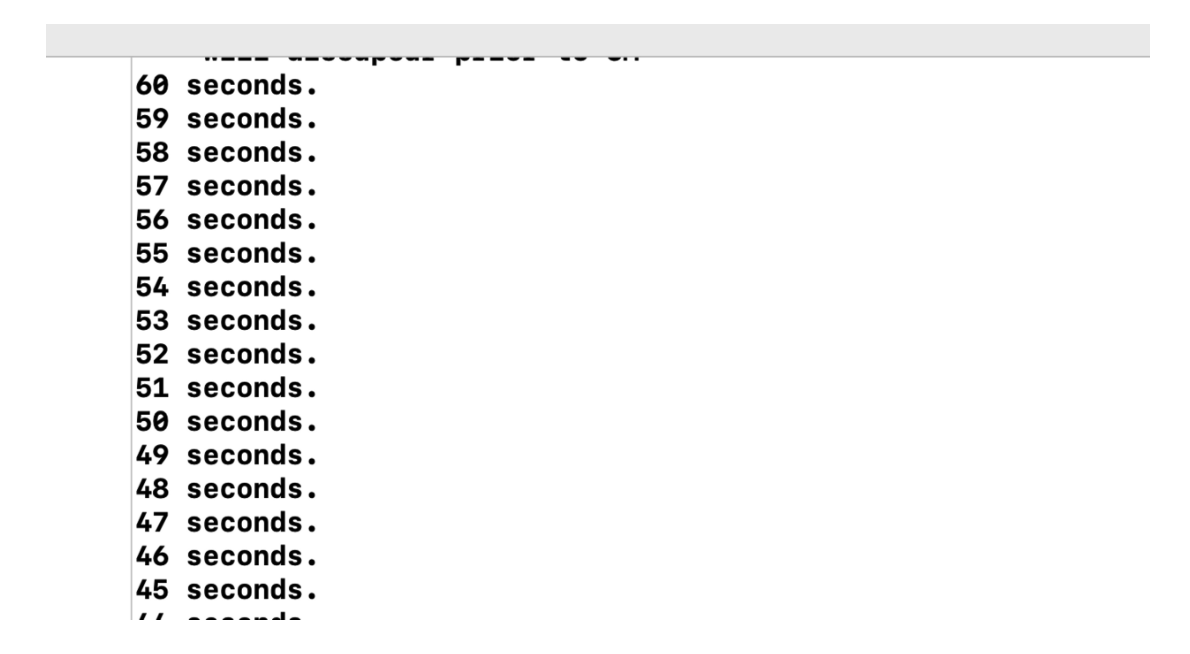 위와 같이 버튼을 눌렀을때 60부터 countdown하는 코드를 작성해보자!
before
1
2
3
4
5
6
7
8
9
10
11
12
13
14
15
16
17
18
19
20
21
22
23
24
25
26
27
28
29
import UIKit

class ViewController: UIViewController {

    let eggTimes = ["Soft" : 5, "Medium" : 7, "Hard" : 12]

    //let softTime = 5
    //let mediumTime = 7
    //let hardTime = 12

    @IBAction func hardnessSelected(_ sender: UIButton) {

        let hardness = sender.currentTitle!

        print(eggTimes[hardness])


//        switch hardness {
//        case "Soft" : print(softTime)
//        case "Medium" : print(mediumTime)
//        case "Hard" : print(hardTime)
//        default: print("none")
//        }


    }

}
after
1
2
3
4
5
6
7
8
9
10
11
12
13
14
15
16
17
18
19
20
21
22
23
24
25
26
27
28
29
30
31
32
33
34
35
36
37
38
39
40
41
42
43
44
45
46
47
import UIKit

class ViewController: UIViewController {

    let eggTimes = ["Soft" : 5, "Medium" : 7, "Hard" : 12]

    //let softTime = 5
    //let mediumTime = 7
    //let hardTime = 12

    var counter = 60

    override func viewDidLoad() {
        super.viewDidLoad()

        Timer.scheduledTimer(timeInterval: 1.0, target: self, selector: #selector(updateCounter), userInfo: nil, repeats: true)
    }


    @IBAction func hardnessSelected(_ sender: UIButton) {

        let hardness = sender.currentTitle!

        print(eggTimes[hardness])


//        switch hardness {
//        case "Soft" : print(softTime)
//        case "Medium" : print(mediumTime)
//        case "Hard" : print(hardTime)
//        default: print("none")
//        }


    }

    @objc func updateCounter() {
        //example functionality
        if counter > 0 {
            print("\(counter) seconds.")
            counter -= 1
        }
    }

}
강의의 코드
1
2
3
4
5
6
7
8
9
10
11
12
13
14
15
16
17
18
19
20
21
22
23
24
25
26
27
28
29
30
31
32
33
34
35
36
37
38
39
40
41
42
43
44

import UIKit

class ViewController: UIViewController {

    let eggTimes = ["Soft" : 300, "Medium" : 420, "Hard" : 720]

    var secondsRemaining = 60


    @IBAction func hardnessSelected(_ sender: UIButton) {

        let hardness = sender.currentTitle!

        secondsRemaining = eggTimes[hardness]!

        Timer.scheduledTimer(timeInterval: 1.0, target: self, selector: #selector(updateTimer), userInfo: nil, repeats: true)
        //print(eggTimes[hardness])


//        switch hardness {
//        case "Soft" : print(softTime)
//        case "Medium" : print(mediumTime)
//        case "Hard" : print(hardTime)
//        default: print("none")
//        }


    }

    @objc func updateTimer() {
        //example functionality
        if secondsRemaining > 0 {
            print("\(secondsRemaining) seconds.")
            secondsRemaining -= 1
        }
    }

}
구글링을 하여 코드를 작성하였다.
굳이 viewdidload가 필요가 없었다.
Timer의 매개변수는 총 5개가 있다.
1
Timer.scheduledTimer(timeInterval: 1.0, target: self, selector: #selector(updateTimer), userInfo: nil, repeats: true)
timeInterval : 타이머 실행 간격, Double Type
target : 함수 selector가 호출되어야 하는class instance, 보통 self
selector : 타이머가 실행될때 호출하는 함수 #selector(…) 형태
userInfo : selector에게 제공되는 데이터가 있는 dictionary, 없으면 nil
repeats: 타이머의 반복여부 Bool Type
#selector는 objective-C가 없으면 에러가 난다. 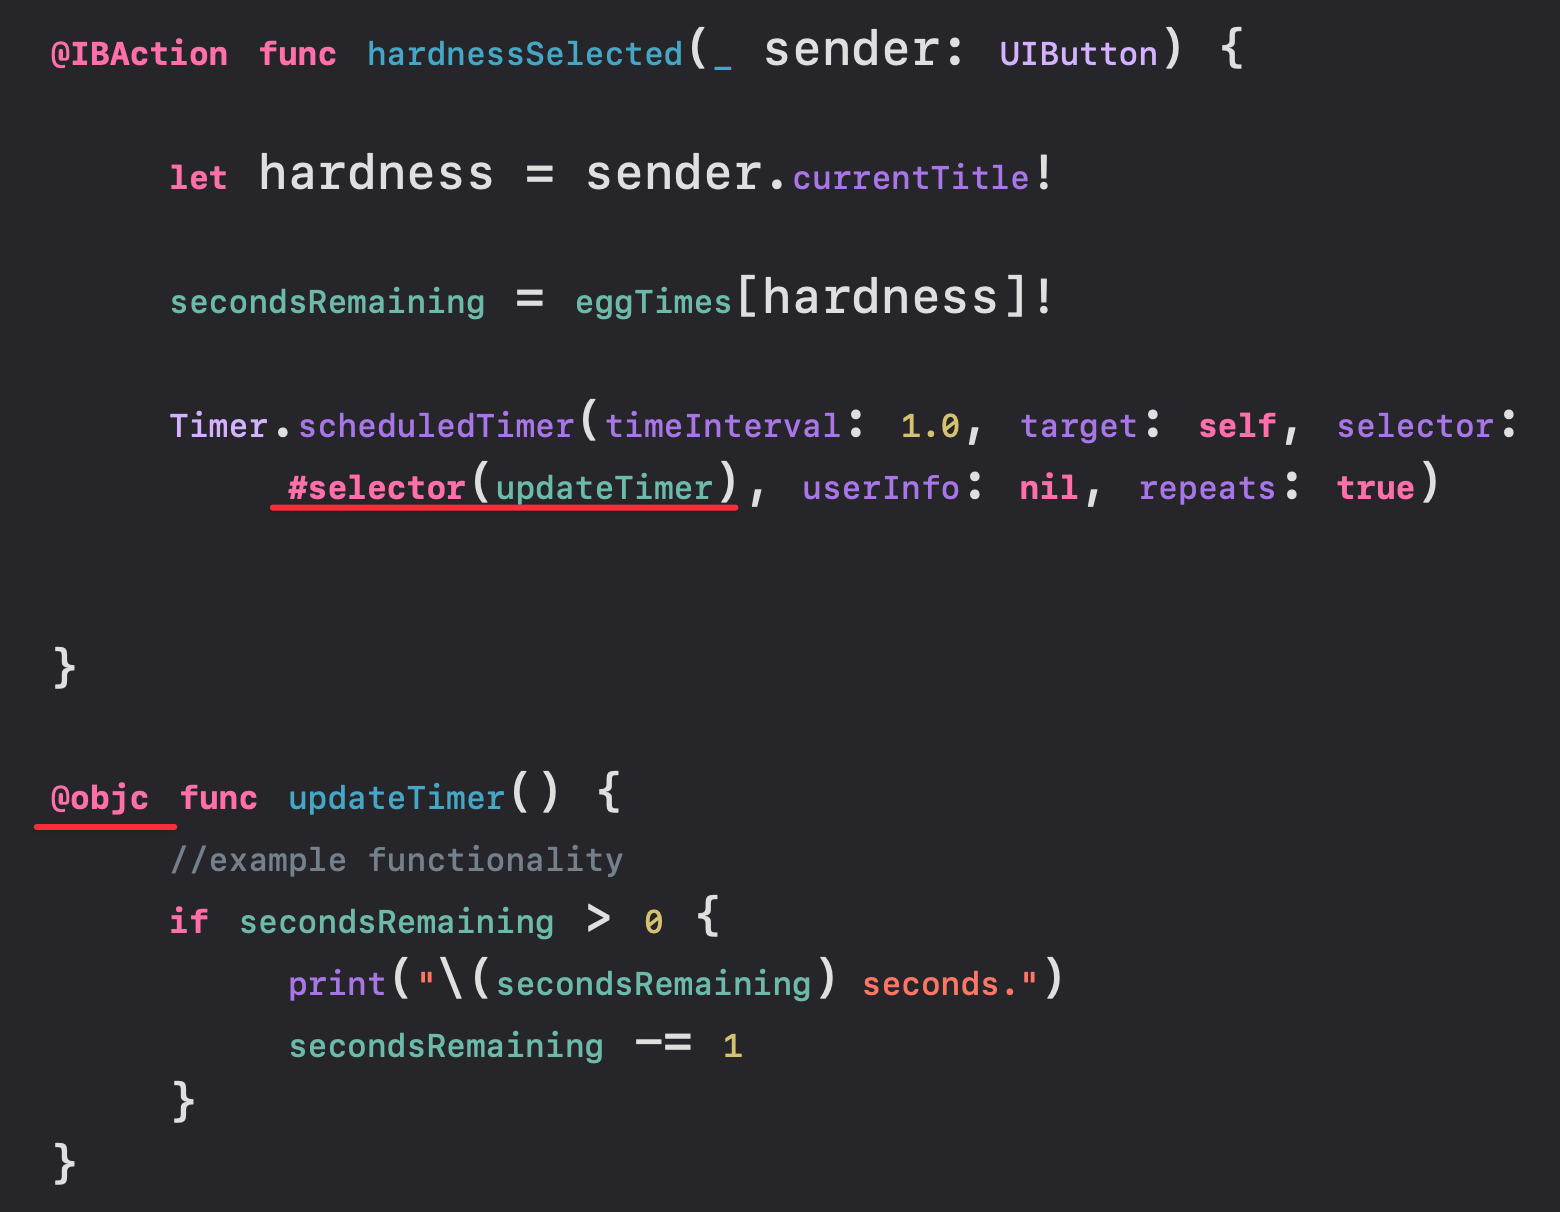
현재 위와 같은 코드를 작성하게되면 버튼을 여러개 누르면 타이머의 속도가 누른만큼 배로 빨라진다.
그것을 방지하기위에 추가로 코드를 작성한다.
1
2
3
4
5
6
7
8
9
10
11
12
13
14
15
16
17
18
19
20
21
22
23
24
25
26
import UIKit

class ViewController: UIViewController {

    let eggTimes = ["Soft" : 3, "Medium" : 4, "Hard" : 7]

    var secondsRemaining = 60

    var timer = Timer()

    @IBOutlet weak var titleLabel: UILabel!


    @IBAction func hardnessSelected(_ sender: UIButton) {

        timer.invalidate()

        let hardness = sender.currentTitle!

        secondsRemaining = eggTimes[hardness]!

        timer = Timer.scheduledTimer(timeInterval: 1.0, target: self, selector: #selector(updateTimer), userInfo: nil, repeats: true)


    }
추가한건 timer라는 변수를 하나 생성하였고 timer라는 변수에 ibaction에 있던 메서드를 넣었다.
그리고 위에 timer.invalidate()를 추가 하였다.
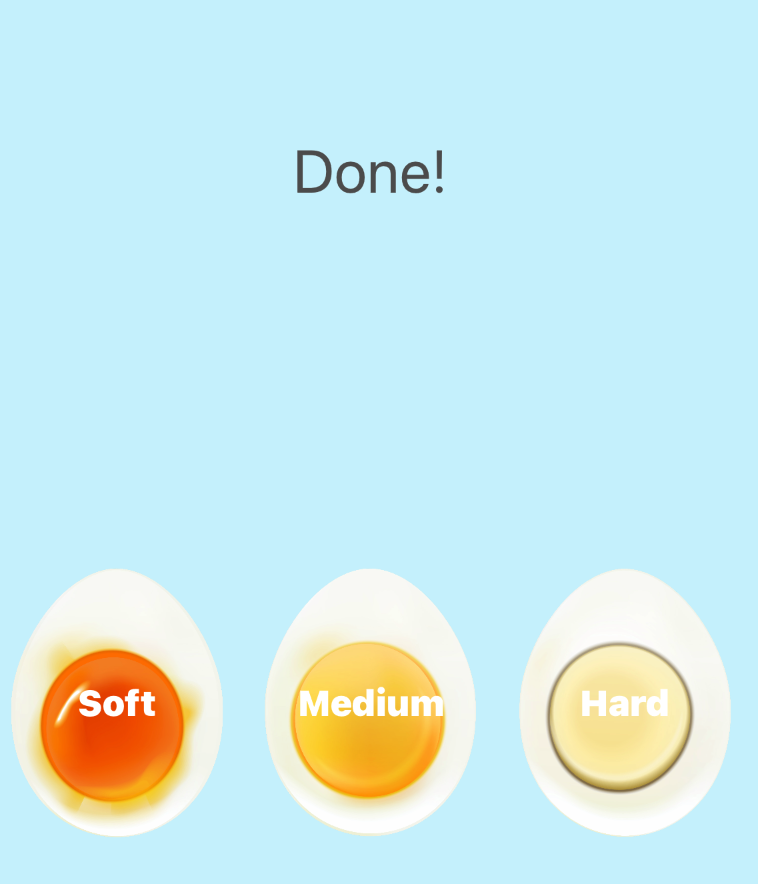
- 반복되는 타이머를 중지시킨다. 즉 중첩되는 타이머를 중단하는 의미로 생각하면 될것같다. — 시간이끝나면 done!이 뜨게하는 코드를 추가해보자.
1
2
3
4
5
6
7
8
9
10
11
@objc func updateTimer() {
        //example functionality
        if secondsRemaining > 0 {
            print("\(secondsRemaining) seconds.")
            secondsRemaining -= 1
        } else {
            timer.invalidate()
            titleLabel.text = "Done!"
        }

    }
완성 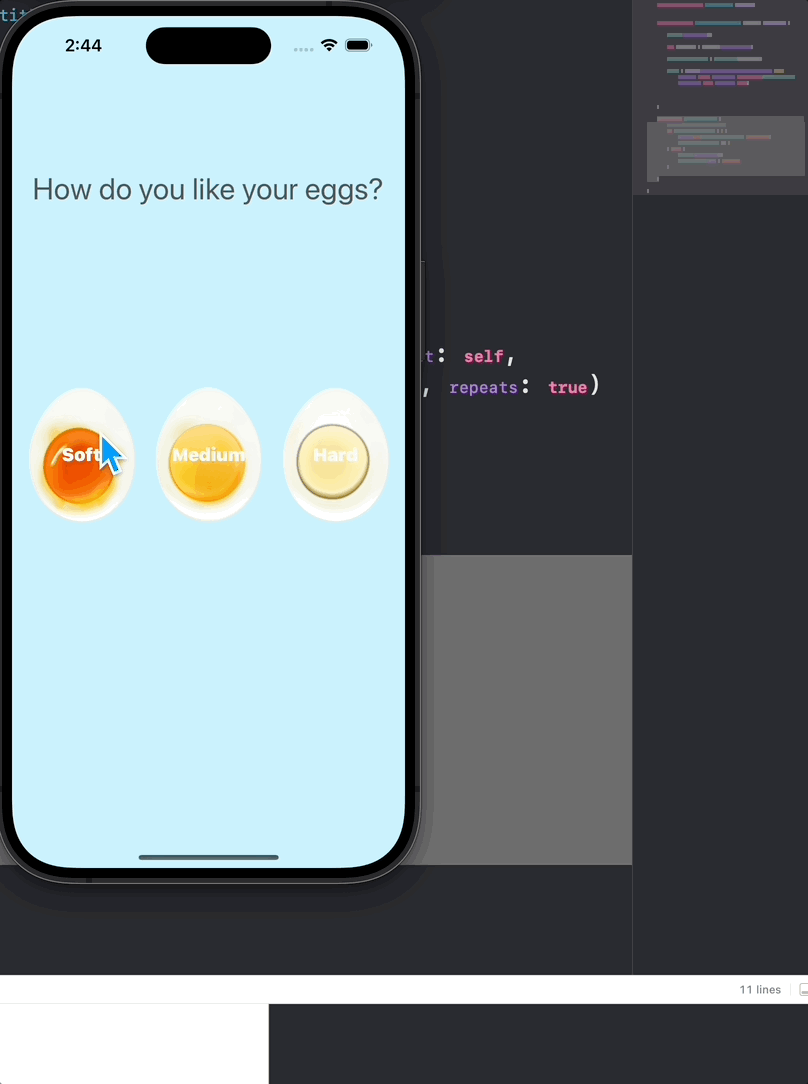
이 기사는 저작권자의 CC BY 4.0 라이센스를 따릅니다.