WatchOS 찍먹 (1)
Udemy 옛날 강의가 있어서 (2021) 어떤지 궁금해서 정리겸 적어본다.
일단 강의에서는
- watchOS 및 SwiftUI
- 위치 권한 및 위치 접근성
- Info.plist 설정 및 위치 추적 권한 처리
- watchOS에서의 CLLocationManager 활용 및 위치 추적 구현
- 제네릭 네트워크 매니저(Generic Network Manager) 설계
- watchOS 환경에서의 네트워킹 및 API 호출
- 위치 변경 사항을 모니터링하기 위한 OnReceive 옵저버 활용
- 좌표 값을 활용한 역 지오코딩(Reverse geocoding, 위경도를 주소로 변환)
이렇게 다룬다고 하는데 강의 내용이 짧아서 제목도 찍먹으로 적었다.
옛날 강의라서 Deprecated 된 부분도 많을거라 그부분은 나중에 기회되면 고쳐보는걸로
1. WatchOS 프로젝트 만들기 및 기본세팅
프로젝트를 만들때 이렇게
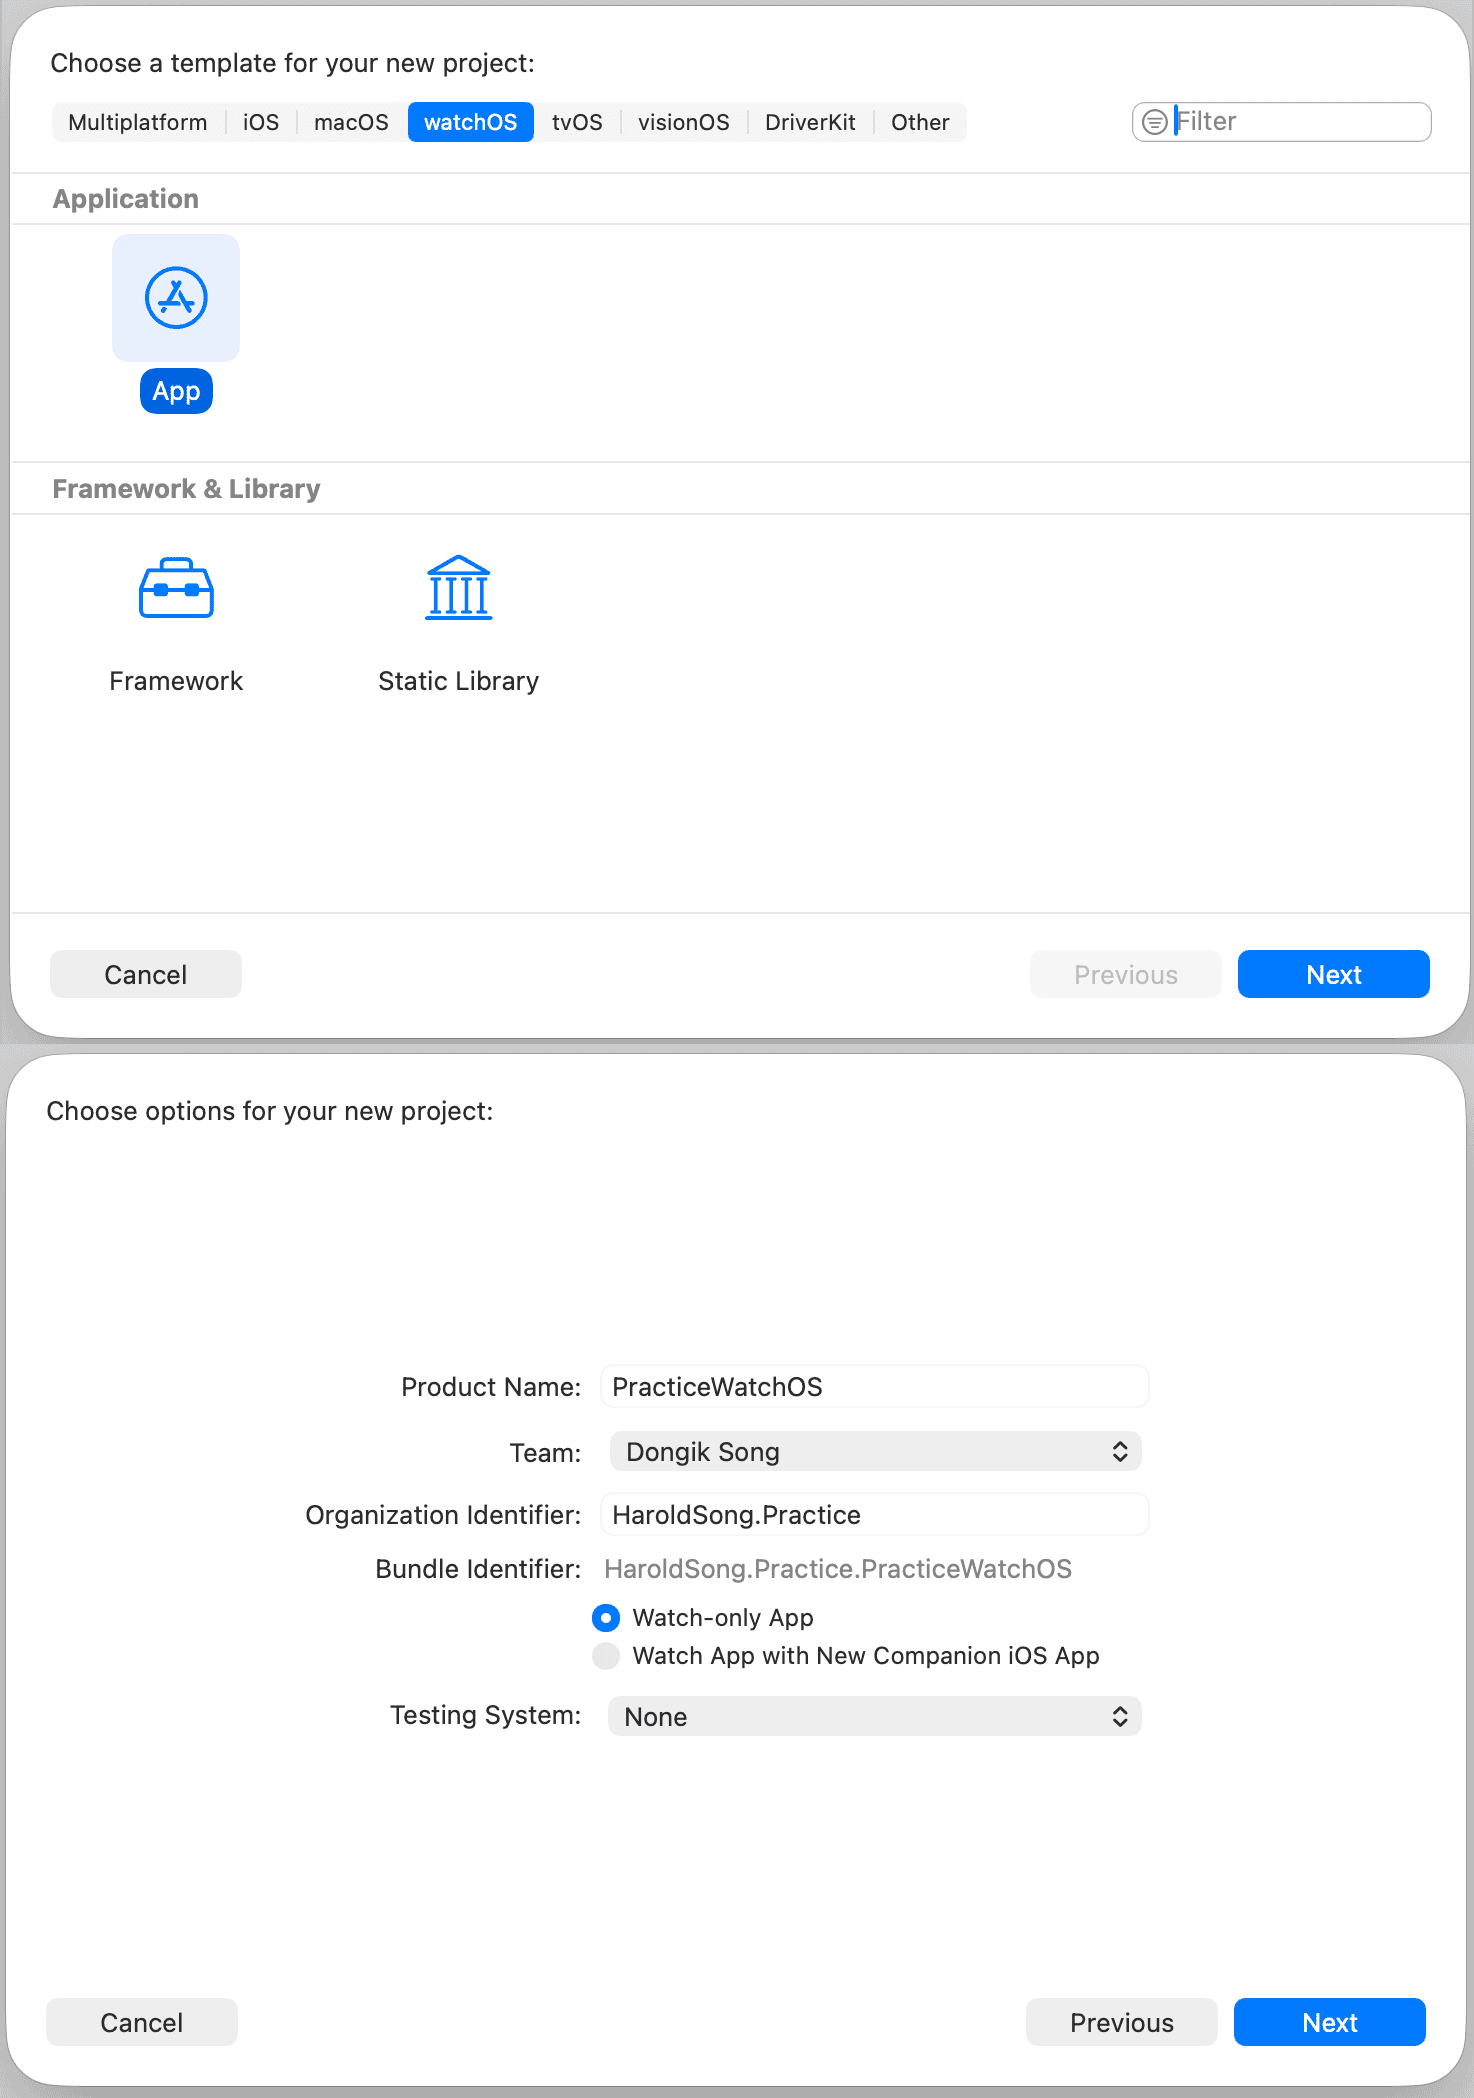
추가를 한다.
이때 체크박스에 Watch App with New Companion iOS App 이게 있는데
워치 앱을 단독으로 만드는 것이 아니라, iPhone용 앱(iOS)과 Apple Watch용 앱(watchOS)을 하나의 세트로 묶어서 처음부터 동시에 만드는 방식이다.
iOS 앱이 있어야 watchOS 앱을 배포할 수 있고, 두 앱이 데이터를 주고받는 구조(WatchConnectivity)를 쓰려면 iOS 앱이 필요하다. 지금은 watchOS 단독으로만 테스트할 것이라 체크하지 않았다.
구조자체는
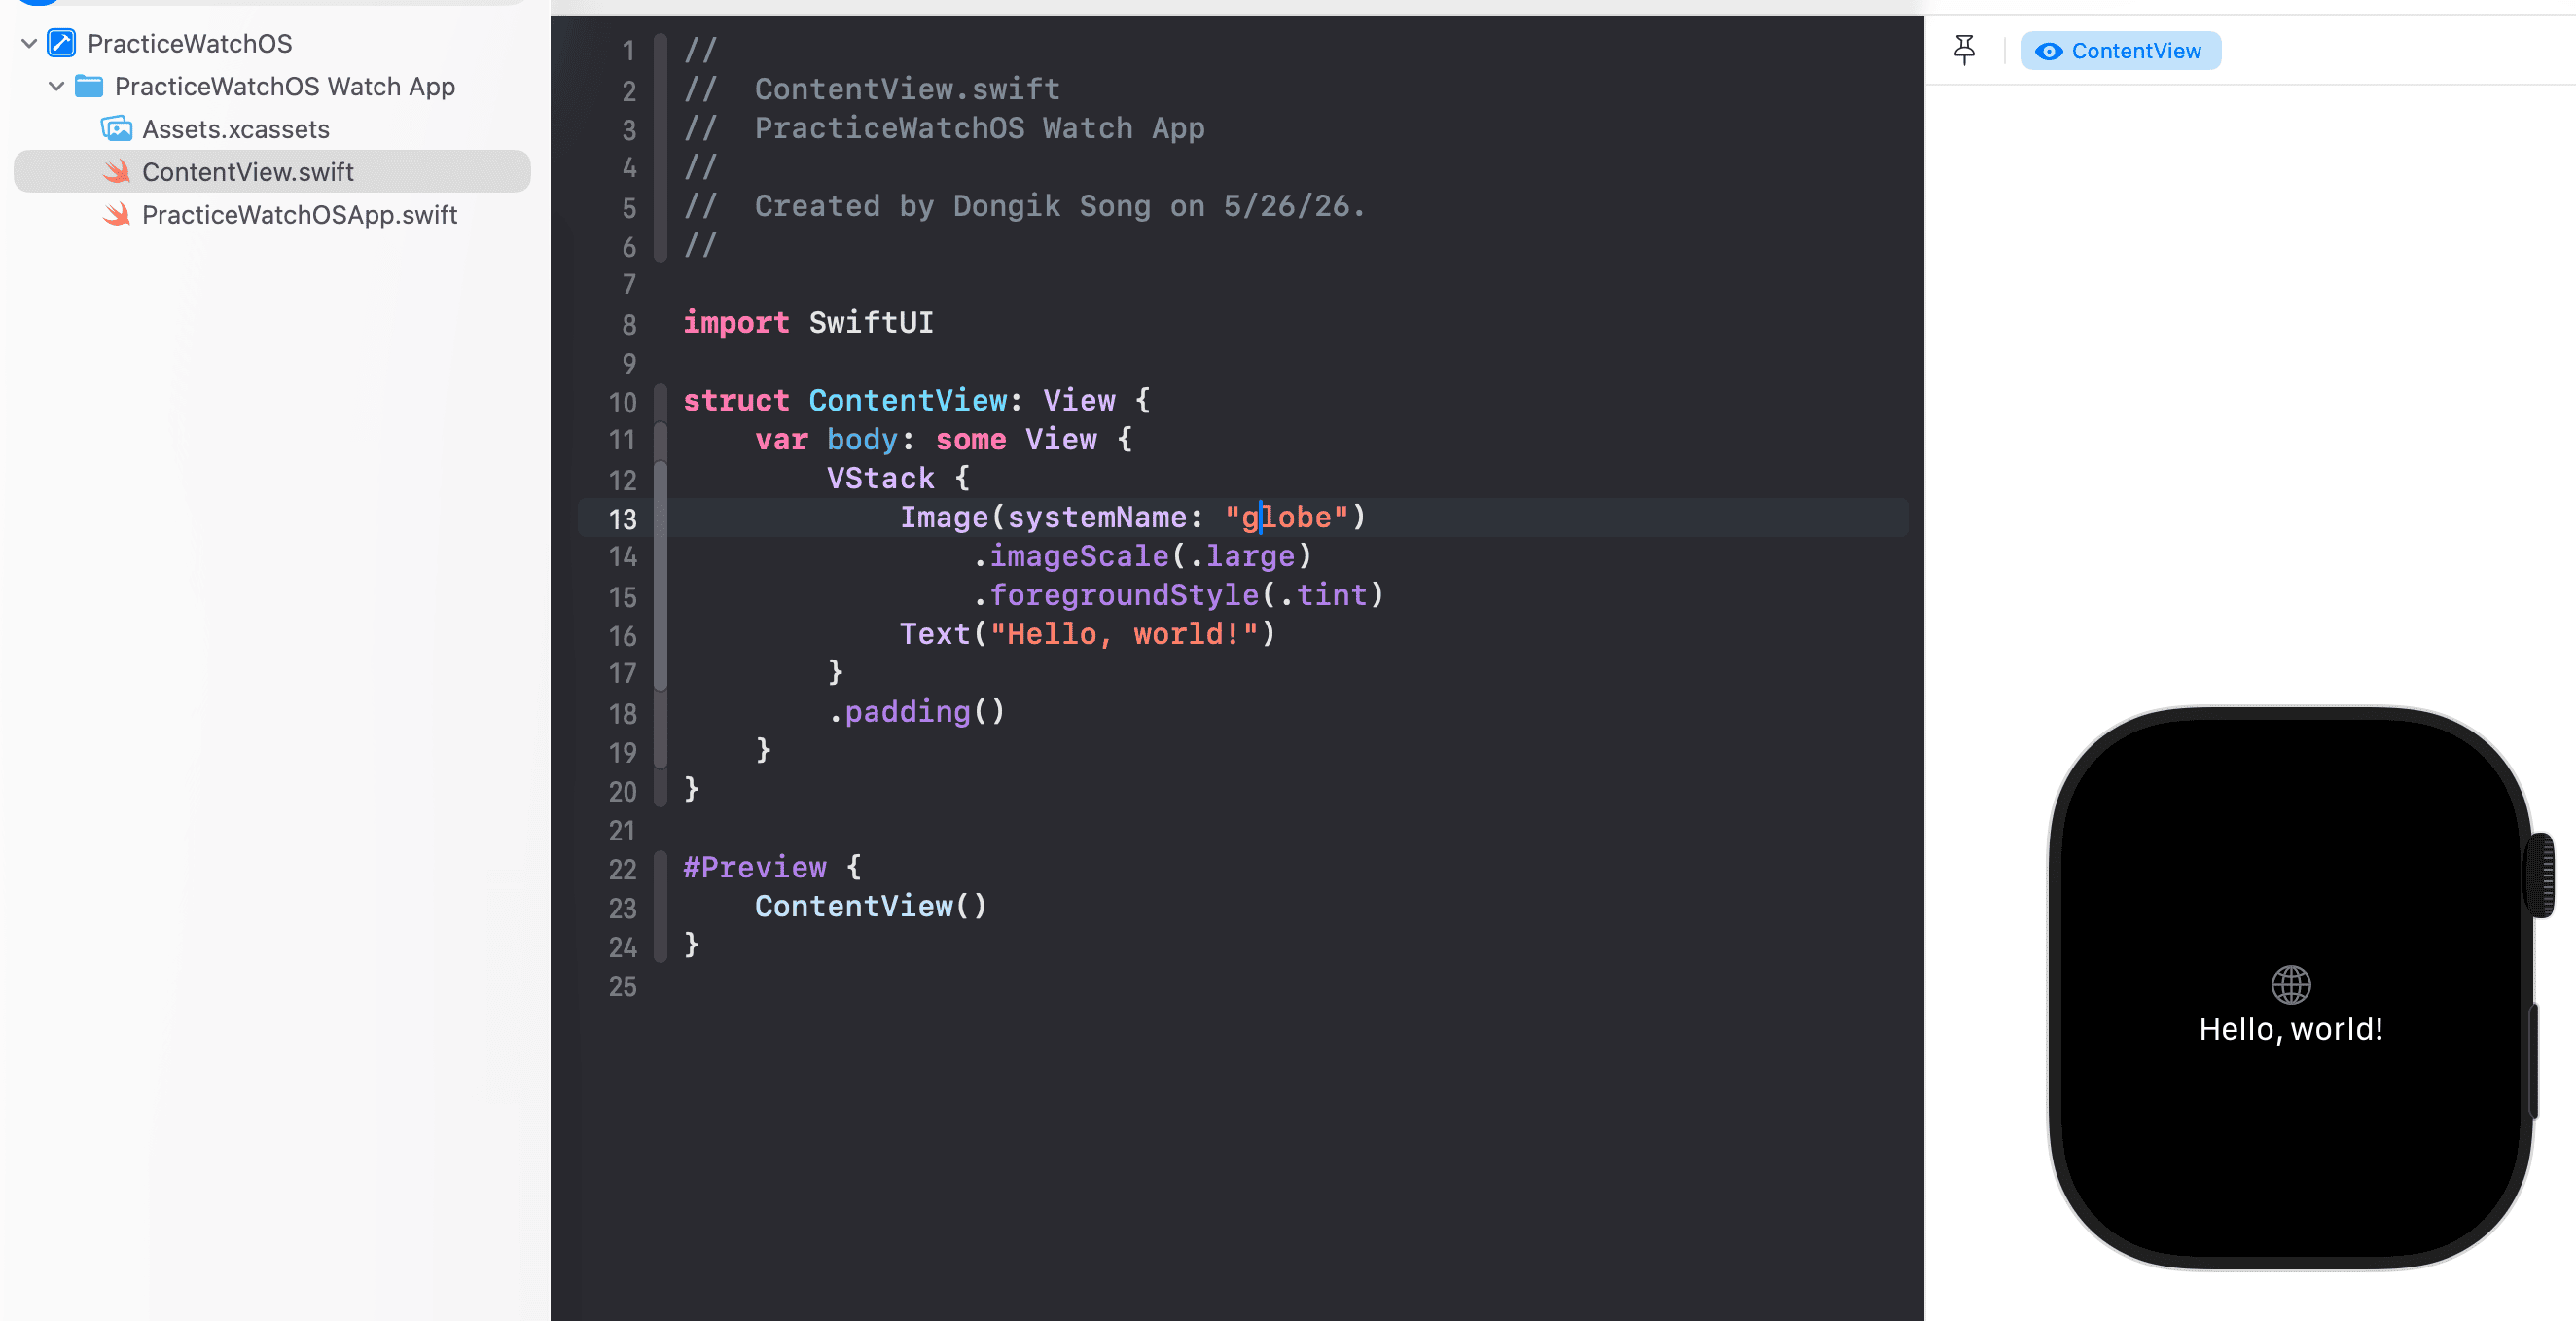
별 차이없다.
그리고 GPS를 사용해야하므로 Info를 설정해준다.

이건 하도 많이해서 굳이 언급하지 않겠다.
2. NetworkManager 만들기
1
2
3
4
5
6
7
8
9
10
11
12
13
14
15
16
17
18
19
20
21
22
23
24
25
26
27
28
29
30
31
32
33
34
35
36
37
38
39
40
41
42
43
44
45
final class NetworkManager<T: Codable> {
    func fetch(for url: URL, completion: @escaping (Result<T, NetworkError>) -> Void) {
        URLSession.shared.dataTask(with: url) { (data, response, error) in

            guard error == nil else {
                completion(.failure(.error(err: error!.localizedDescription)))
                return
            }

            guard let httpResponse = response as? HTTPURLResponse else {
                completion(.failure(.badResponse))
                return
            }

            guard httpResponse.statusCode == 200 else {
                completion(.failure(.wrongStatusCode(code: httpResponse.statusCode)))
                return
            }

            guard let data = data else {
                completion(.failure(.emptyData))
                return
            }

            do {
                let json = try JSONDecoder().decode(T.self, from: data)
                DispatchQueue.main.async {
                    completion(.success(json))
                }
            } catch let err {
                completion(.failure(.decodingError(err: err.localizedDescription)))
            }

        }.resume()

    }
}

enum NetworkError: Error {
    case badResponse
    case wrongStatusCode(code: Int)
    case error(err: String)
    case decodingError(err: String)
    case emptyData
}
아무래도 예전 강의다 보니 CompletionHandler를 사용했는데
그래도 방식이 신선하다.
함수에 제네릭을 사용한게 아니라 class에사용을 했다.
3. Model 만들기
일단 강의에서 언급한 api사이트는 현재 사라져서
https://openweathermap.org/api 여기를 대체해서 사용하도록 한다.
이전글에서도 사용했었는데, 여기선 도시명 대신 좌표로 한다.
위 사이트는, One Call API경우 유료이기 때문에
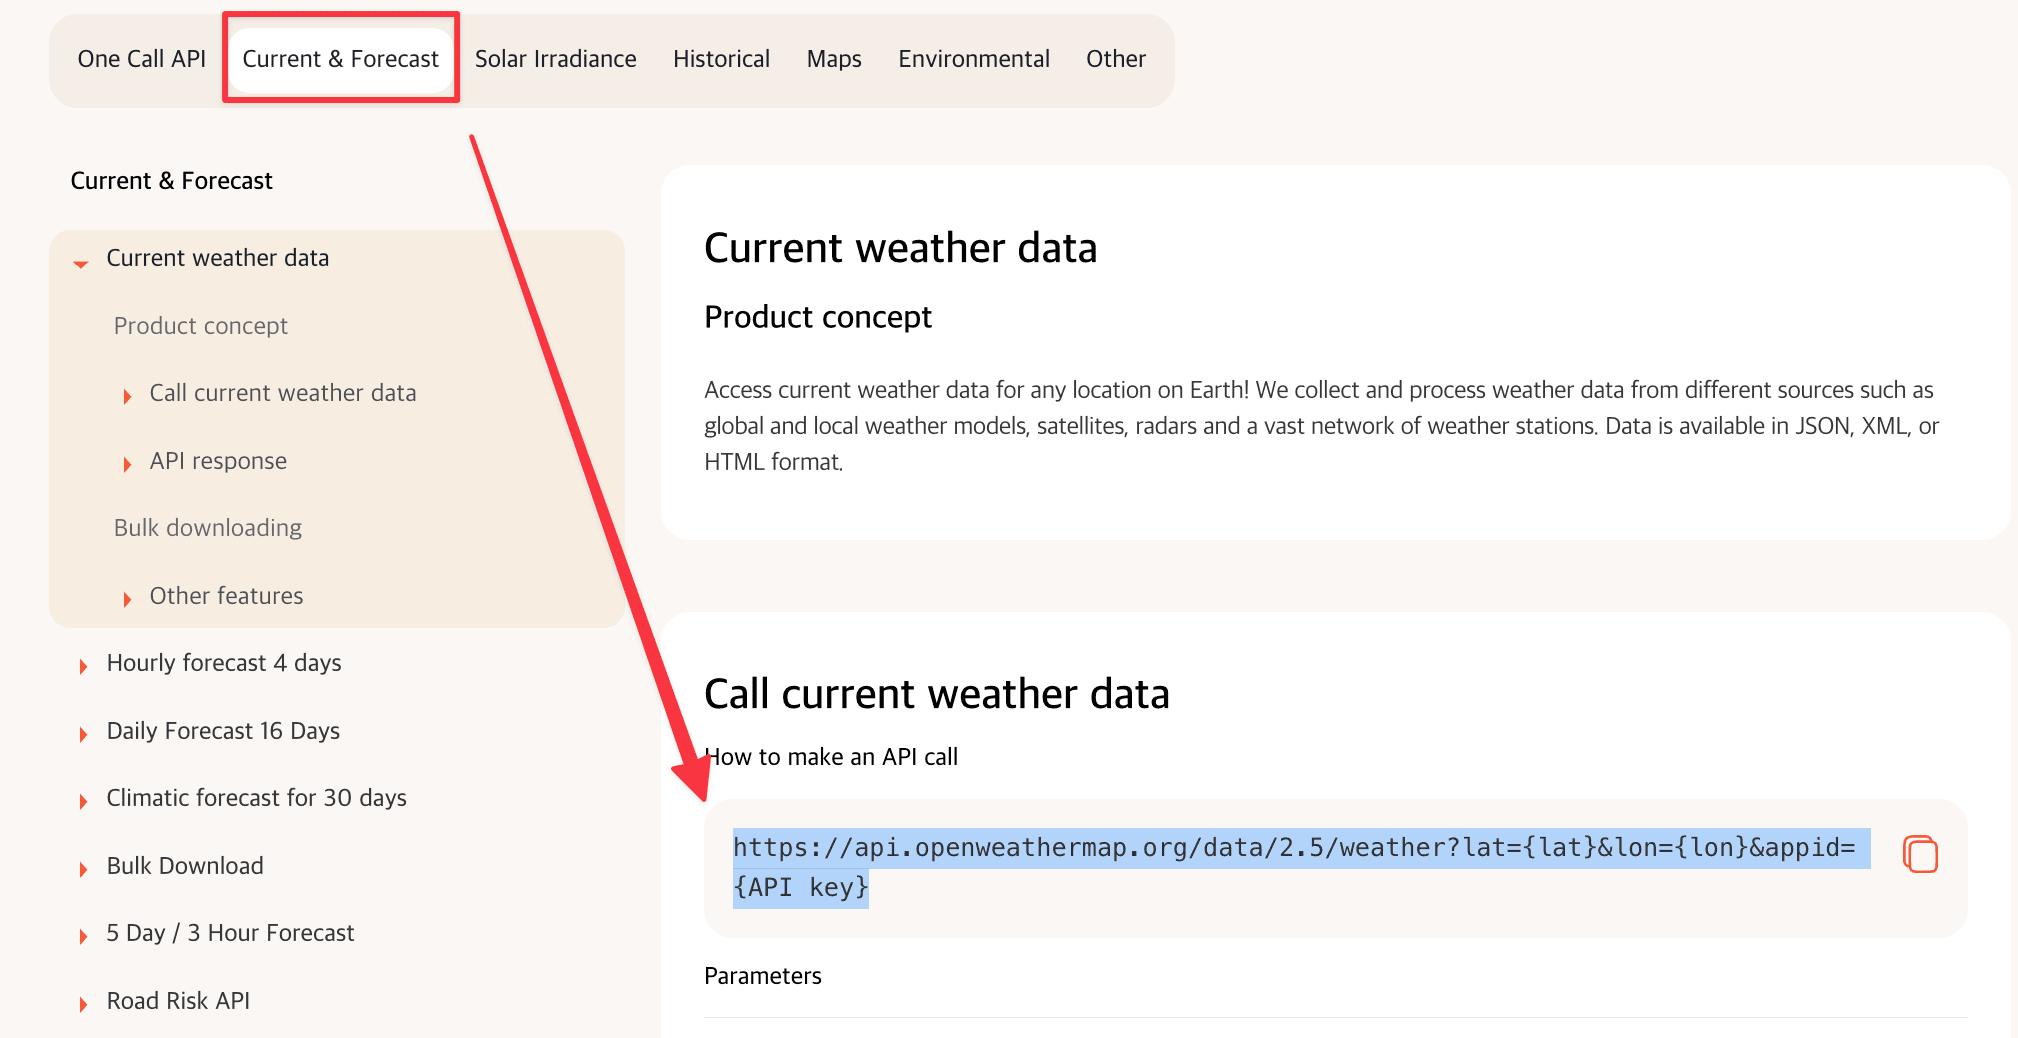
반드시 확인하자.
우선 이렇게 모델링을 했다.
1
2
3
4
5
6
7
8
9
10
11
12
13
14
15
16
17
18
19
20
21
22
23
24
25
26
27
28
29
30
31
32
33
34
35
36
37
38
39
40
41
42
43
44
struct WeatherResponse: Codable {
    var forcast: [WeatherModel]
}

struct WeatherModel: Codable {
    let weather: [Weather]
    let main: Main
    let name: String
}

struct Main: Codable {
    let temp: Double
}

struct Weather: Codable {
    let id: Int
    let main, description: String

    var conditionName : String {
        switch id {
        case 200...232 :
            return "cloud.bolt"
        case 300...321 :
            return "cloud.drizzle"
        case 500...531 :
            return "cloud.rain"
        case 600...622 :
            return "cloud.snow"
        case 700...781 :
            return "cloud.fog"
        case 800 :
            return "sun.max"
        case 801...804 :
            return "cloud.bolt"
        default :
            return "cloud"
        }
    }
}

struct WeatherCoordinates {
    var lat: Double
    var lon: Double
}
특이점이라면 WeatherResponse를 통해 일부러 값을 배열로 저장한다는 것.
그냥 모델로 덩그러니 있는것보단 배열로 감싸서 관리하는게 더 좋을듯해서 그런게 아닐까 싶다.
그리고 WeatherCoordinates를 통해서 좌표를 관리하게 했다.
4. WeatherManager 만들기
1
2
3
4
5
6
7
8
9
10
11
12
13
14
15
16
17
final class WeatherManager: ObservableObject {

    @Published var weatherResponse = WeatherResponse(forcast: [])

    func getWeather(for coord: WeatherCoordinates) {
        let url = URL(string: "https://api.openweathermap.org/data/2.5/weather?lat=\(coord.lat)&lon=\(coord.lon)&appid=APIKEY")!
        NetworkManager<WeatherResponse>().fetch(for: url) { (result) in
            switch result {

            case .success(let resp):
                self.weatherResponse = resp
            case .failure(let err):
                print(err.localizedDescription)
            }
        }
    }
}
이때 coord의 들어가는 Type이 우리가 위에서 만든 좌표 모델이다.
5. LocationManager 만들기
1
2
3
4
5
6
7
8
9
10
11
12
13
14
15
16
17
18
19
20
21
22
23
24
25
26
27
28
29
30
31
32
33
34
35
36
37
final class WeatherLocationManager: NSObject, ObservableObject, CLLocationManagerDelegate {

    @Published var cityName = "San Francisco"
    @Published var coordinate: CLLocationCoordinate2D = CLLocationCoordinate2D(latitude: 37.231, longitude: -122.2322)

    private var locationManager: CLLocationManager

    override init() {
        locationManager = CLLocationManager()

        super.init()

        locationManager.requestAlwaysAuthorization()
        locationManager.startUpdatingLocation()
        locationManager.delegate = self
    }

    func locationManager(_ manager: CLLocationManager, didUpdateLocations locations: [CLLocation]) {
        guard let location = locations.last else { return }
        coordinate = location.coordinate

        getCityForCoordinates(location: coordinate)
    }

    private func getCityForCoordinates(location: CLLocationCoordinate2D) {
        let url = URL(string: "https://api-bdc.net/data/reverse-geocode?latitude=\(location.latitude)&longitude=\(location.longitude)&localityLanguage=en&key=APIKEY")!

        NetworkManager<CityModel>().fetch(for: url) { (result) in
            switch result {
            case .success(let cityData):
                self.cityName = "\(cityData.city), \(cityData.countryCode)"
            case .failure(let err):
                print(err.localizedDescription)
            }
        }
    }
}
Bigdatacloud사이트에서 api를 통해 좌표를 통한 도시정보를 가져온다.
그래서 도시 모델링도 따로 해준다.
1
2
3
4
5
struct CityModel: Codable {
    var city: String
    var principalSubdivision: String
    var countryCode: String
}
여기는 locationManager를 통해 좌표값을 가져오면 getCityForCoordinates에 그 좌표값을 대입하여 그 좌표에 관한 도시정보를 가져오도록 전개되어있다.
6. OutlineView 만들기
1
2
3
4
5
6
7
8
9
10
11
12
13
14
struct OutlineView: View {
    var body: some View {
        RoundedRectangle(cornerRadius: 10)
            .stroke(
                LinearGradient(
                    gradient: Gradient(colors: [.purple, .blue, .blue.opacity(0.4)]),
                    startPoint: .topLeading,
                    endPoint: .bottomTrailing
                ),
                lineWidth: 4
            )
            .padding()
    }
}
이렇게 해서 테두리를 만들어 주었다.
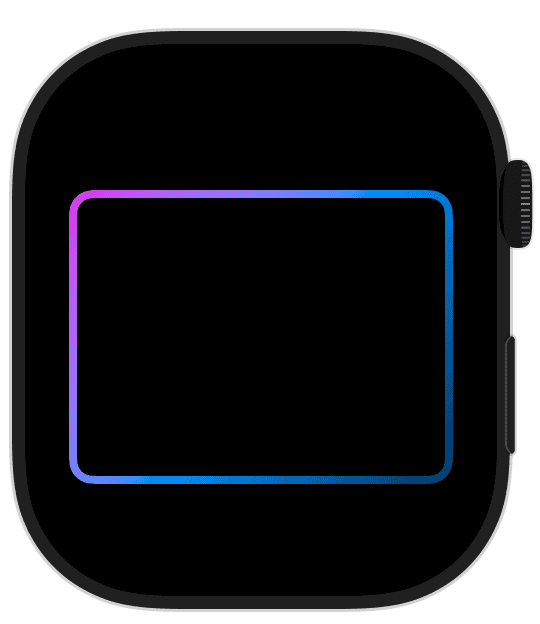
7. Watch Weather View 만들기
1
2
3
4
5
6
7
8
9
10
11
12
13
14
15
16
17
18
19
20
21
22
23
24
25
26
27
28
29
30
31
32
33
34
35
36
37
38
39
40
41
struct ContentView: View {
    @ObservedObject private var locationManager = WeatherLocationManager()
    @ObservedObject private var weatherManager = WeatherManager()

    var body: some View {
        ZStack {
            OutlineView()

            VStack(alignment: .center, spacing: 0) {
                HStack {
                    Text(locationManager.cityName)
                        .lineLimit(1)
                        .minimumScaleFactor(0.005)

                    Image(systemName: "paperplane.fill")
                        .font(.caption)
                }

                Image(systemName: weatherManager.weatherResponse.forcast.first?.weather[0].conditionName ?? "sun.min")
                    .font(.title)
                    .foregroundColor(.yellow)

                Text(weatherManager.weatherResponse.forcast.first?.weather[0].description ?? "")
                    .font(.footnote)
                    .foregroundColor(.gray)

                Text("\(String(format: "%0.0f", weatherManager.weatherResponse.forcast.first?.main.temp ?? 0.0))°F")
                    .bold()
                    .font(.title)
            }.shadow(color: Color.white.opacity(0.2), radius: 2, x: -2, y: -2)
                .shadow(color: Color.black.opacity(0.2), radius: 2, x: 2, y: 2)
        }.onReceive(locationManager.$cityName, perform: { _ in
            weatherManager.getWeather(
                for: WeatherCoordinates(
                    lat: locationManager.coordinate.latitude,
                    lon: locationManager.coordinate.longitude
                )
            )
        })
    }
}
이렇게 작성해주었다.
언급할 만한 부분은
1
2
3
4
5
6
7
8
.onReceive(locationManager.$cityName, perform: { _ in
    weatherManager.getWeather(
        for: WeatherCoordinates(
            lat: locationManager.coordinate.latitude,
            lon: locationManager.coordinate.longitude
        )
    )
})
onReceive를 통해서 작성했다는것.
onReceive?
onReceive는 특정 Publisher의 값이 바뀔 때 클로저를 실행하는 뷰 modifier다. 여기선 locationManager.$cityName을 구독해서, 도시명이 업데이트될 때마다 날씨 API를 다시 호출하는 구조다.
즉 위치가 바뀌면 → 도시명이 바뀌면 → onReceive가 감지 → 날씨 재요청 순서로 흘러간다.
Combine의 sink와 비슷한 역할인데, View에서 Publisher를 구독할 때 import Combine 없이 쓸 수 있는 SwiftUI 스타일의 방식이다.
에러 수정
실행해보니
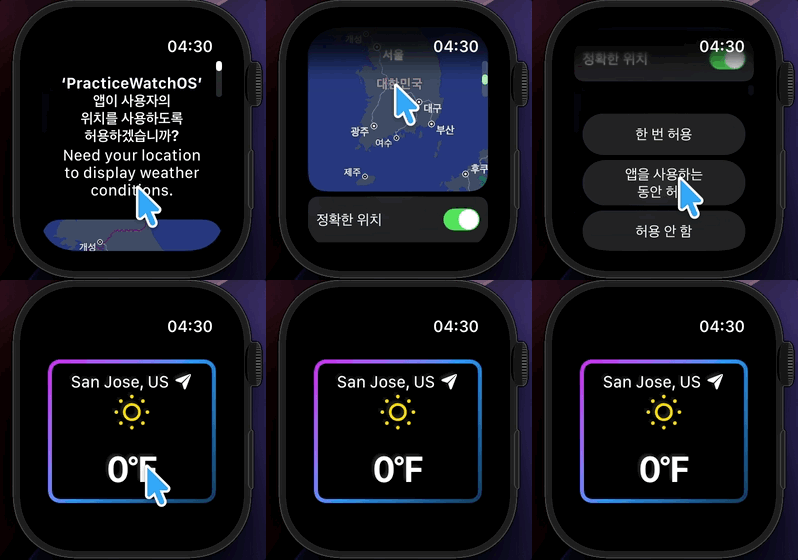
우선은 작동은 되는데, 네트워크에서 에러가 발생.
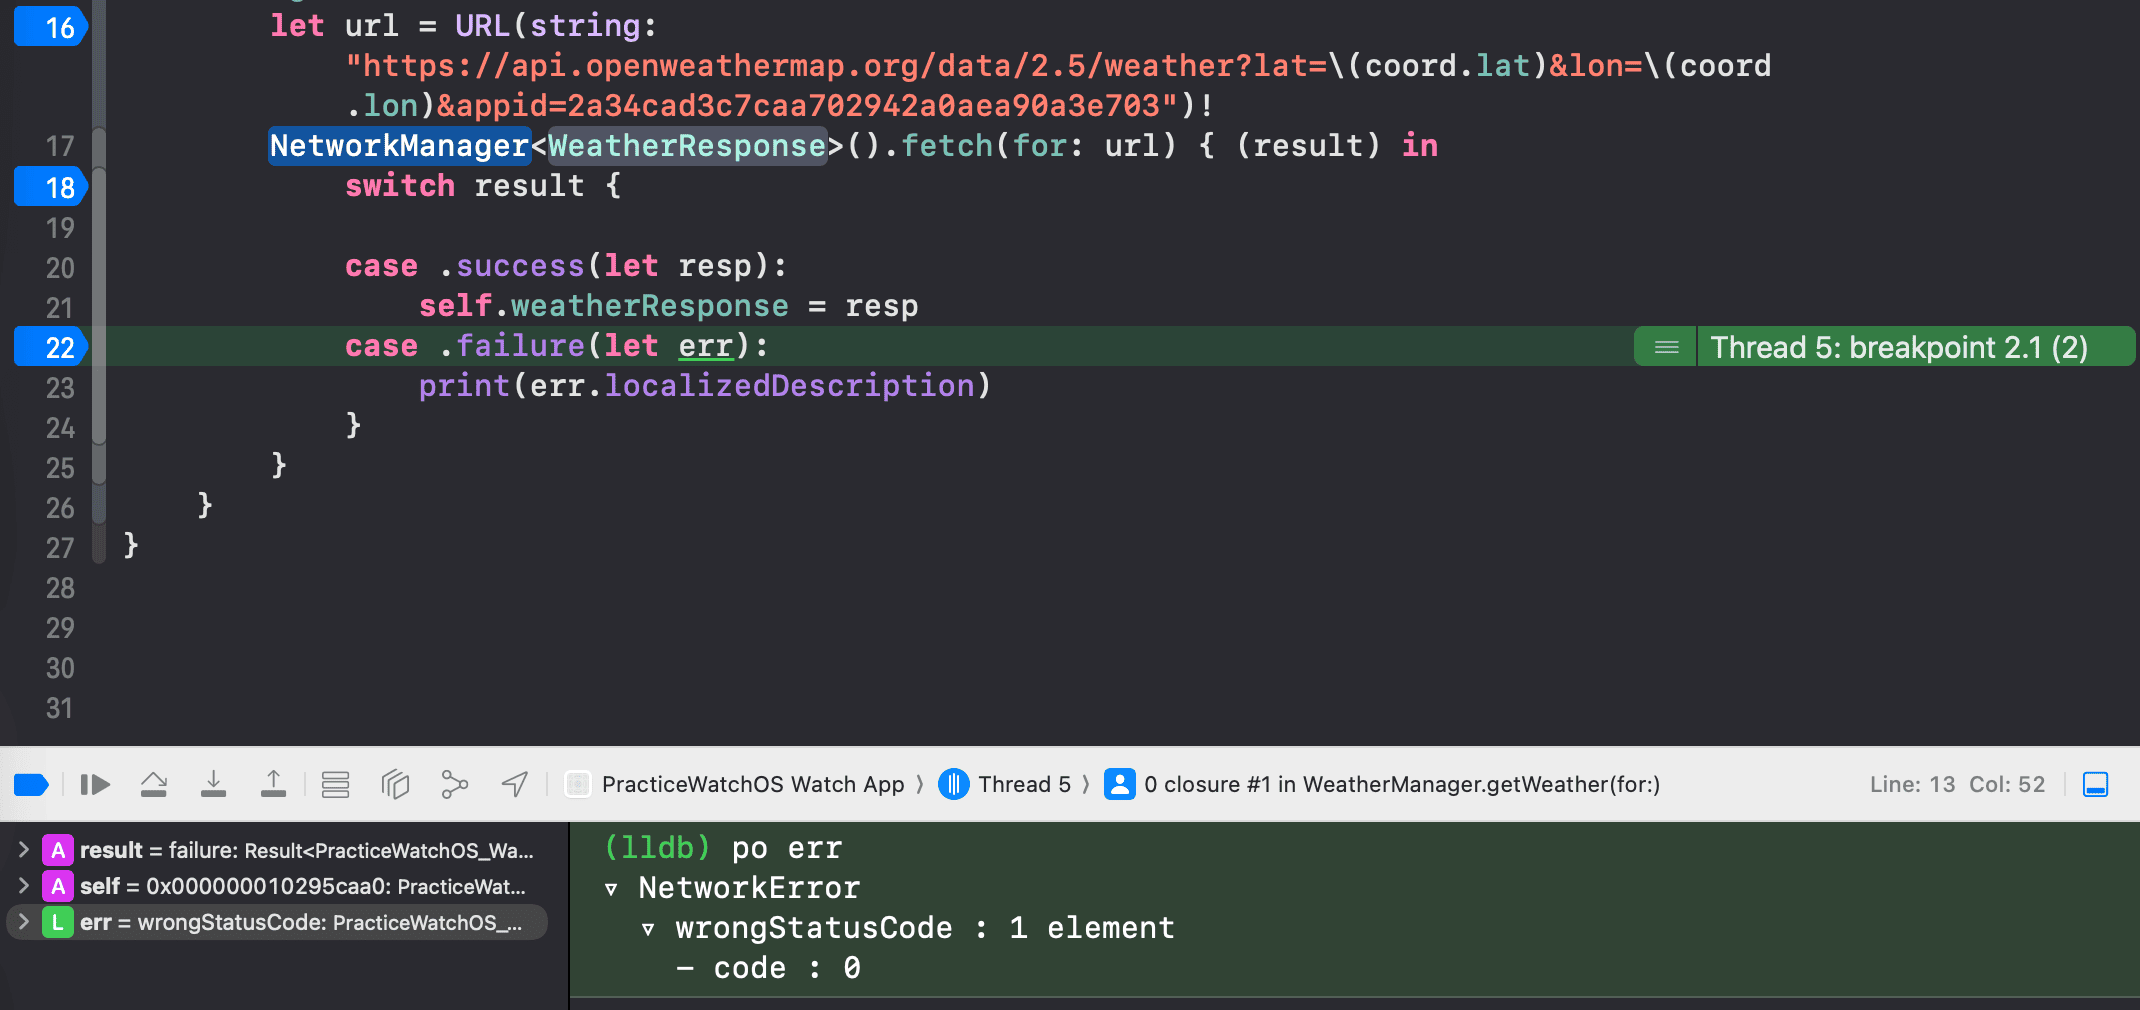
이건 statusCode == 0 으로 터진 근본적인 원인은 OpenWeatherMap이 제공하는 원래 JSON 규격과, 현재 우리가 정의한 WeatherResponse 모델의 구조가 서로 달라서 발생하는 디코딩 매핑 실패 에러이다.
아무생각없이 WeatherResponse 를 쓴게 잘못.
우선 필요없는 WeatherResponse를 삭제한다.
그러면 여러 에러가 발생하는데,
1
2
3
4
5
6
7
8
9
10
11
12
13
14
@Published var weather = [WeatherModel]()

func getWeather(for coord: WeatherCoordinates) {
    let url = URL(string: "https://api.openweathermap.org/data/2.5/weather?lat=\(coord.lat)&lon=\(coord.lon)&appid=2a34cad3c7caa702942a0aea90a3e703")!
    NetworkManager<WeatherModel>().fetch(for: url) { (result) in
        switch result {

        case .success(let resp):
            self.weather = [resp]
        case .failure(let err):
            print(err.localizedDescription)
        }
    }
}
여기를 먼저 수정해준다.
그리고
weatherResponse의 변수명 변경으로 발생한 에러를
1
2
3
4
5
Image(systemName: weatherManager.weather.first?.weather[0].conditionName ?? "sun.min")

Text(weatherManager.weather.first?.weather[0].description ?? "")

Text("\(String(format: "%0.0f", weatherManager.weather.first?.main.temp ?? 0.0))°F")
이렇게 수정해준다.
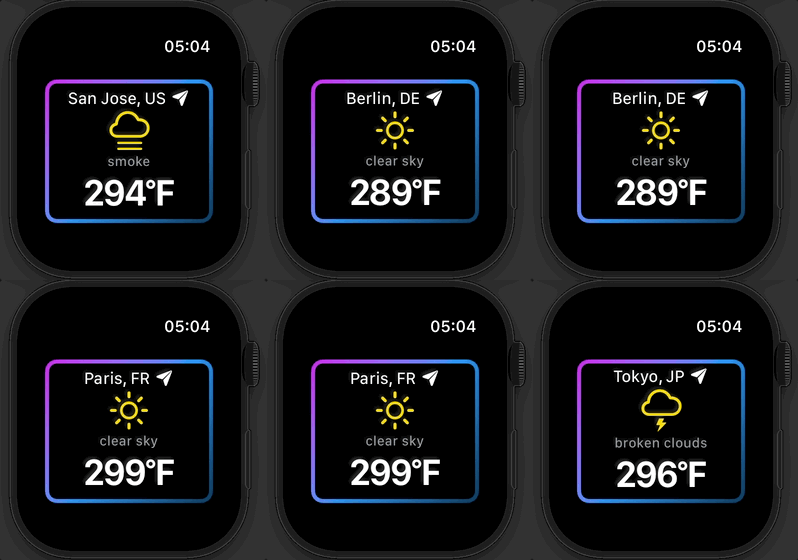
그럼 이렇게 잘되는걸 알 수 있다.
온도 표기 바꾸기
현재 화씨라서 이거만 섭씨로 바꾼다.
이건 날씨 api url 뒤에 &units=metric를 추가해주면 된다.
즉
1
https://api.openweathermap.org/data/2.5/weather?lat=\(coord.lat)&lon=\(coord.lon)&appid=APIKEY&units=metric
이렇게 하면 된다.
다시 실행하면?
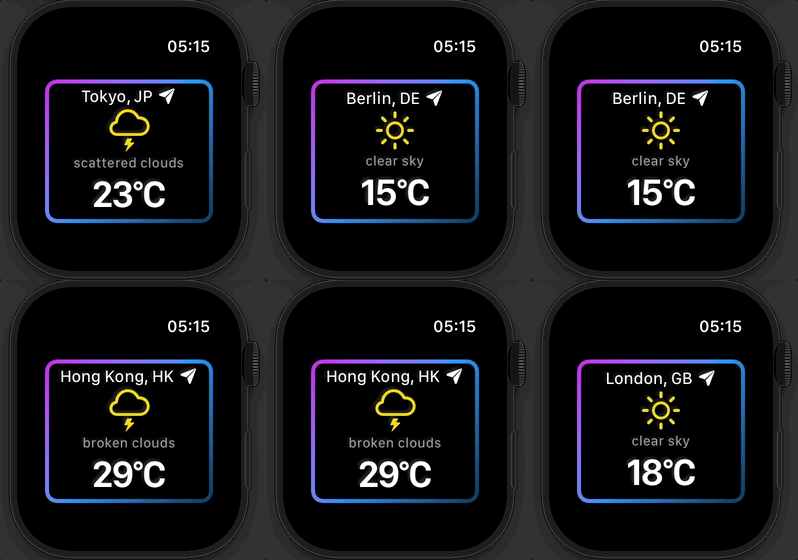
섭씨로 표시가 되는걸 알 수 있다.